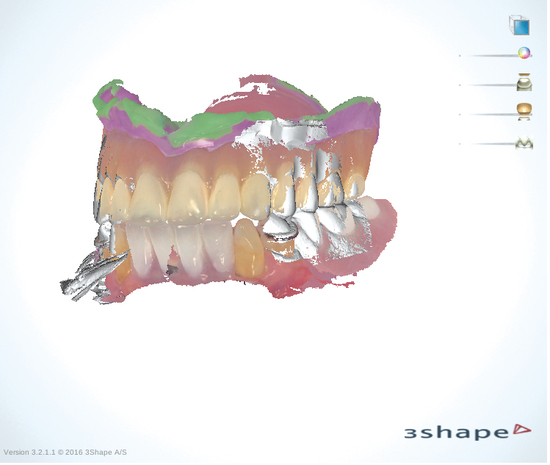
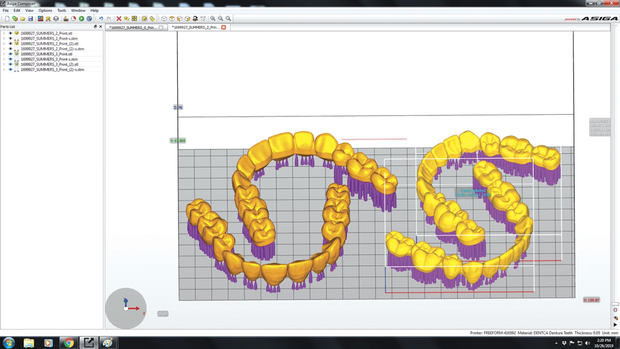
Step 1 - Scan either the working models and bite registration or import the dentist’s intraoral scan into the 3Shape design software. Even though fully edentulous scanning is a newer workflow and is still being perfected, it’s worked well in some situations.
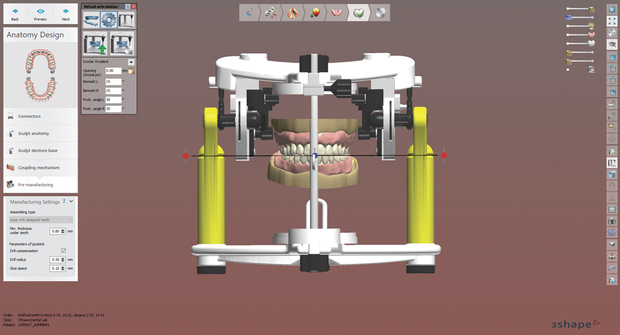
Step 2 - Design the virtual tooth setup and denture base. You can modify the tooth arrangement and stipple and/or festoon the base at this stage.
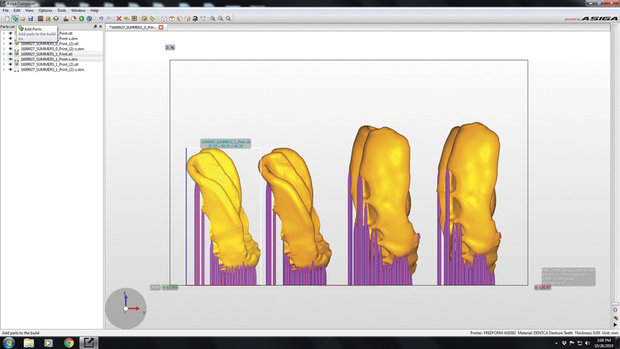
Step 3 - Import the final base design into the Asiga Composer Software and follow the workflow for material selection, resolution quality, position and supports for accurate printing.
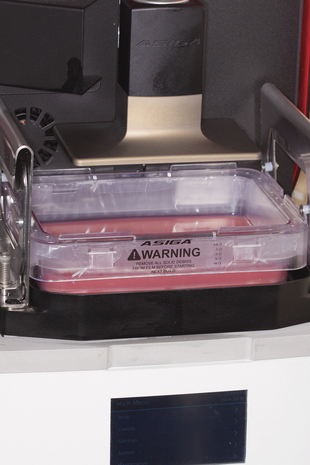
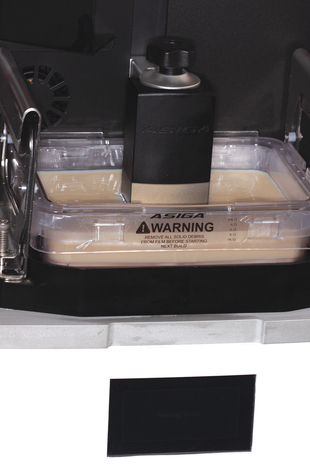
Step 4 - Pour Dentca Denture Base Resin into the Asiga Max print tray and follow the prompts on the control panel to initiate the print job.
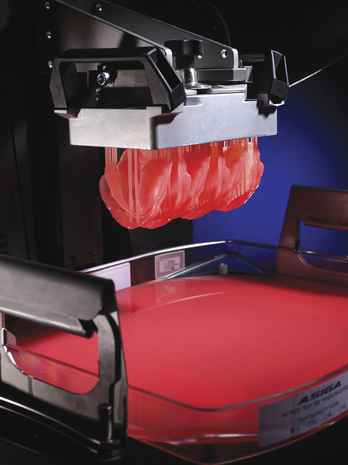
Step 5 - Print the denture base.
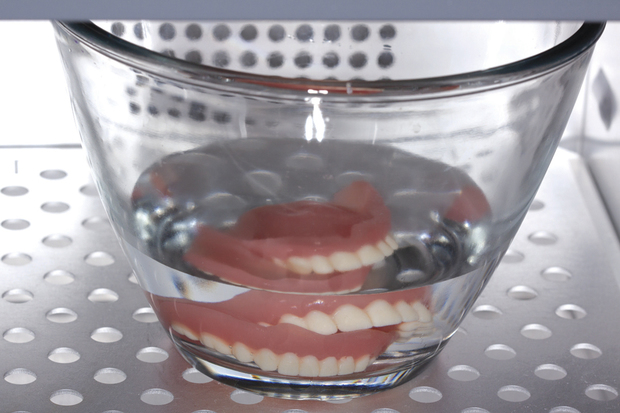
Step 6 - Remove the base from the build platform and clean it in an Isopropyl Alcohol (IPA) bath.
Step 7 - Import the final denture teeth design into the Asiga Composer Software and follow the workflow for material selection, resolution quality, position and supports for accurate printing.
Step 8 - Pour Dentca Tooth Resin into the Asiga Max print tray and follow the prompts on the control panel to initiate the print job.
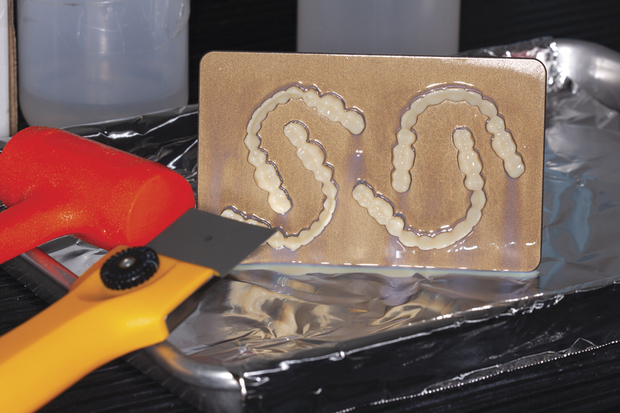
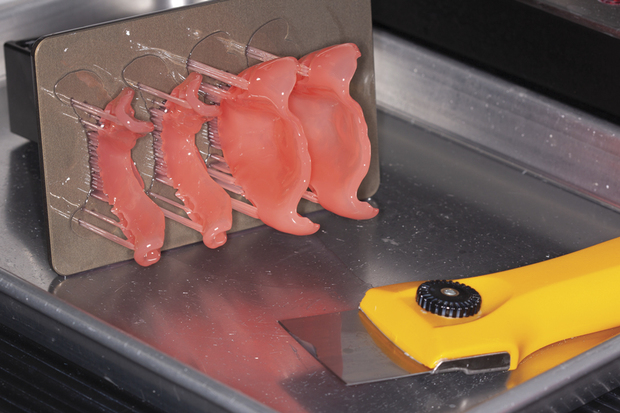
Step 9 - After the printing is complete, remove the Build Platform from the printer, remove the printed teeth from the platform and clean in an IPA bath.
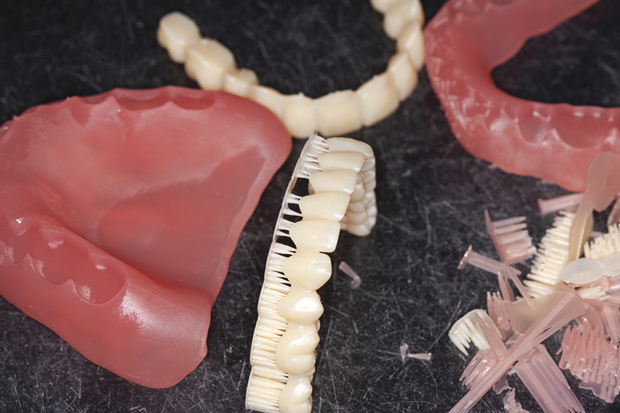
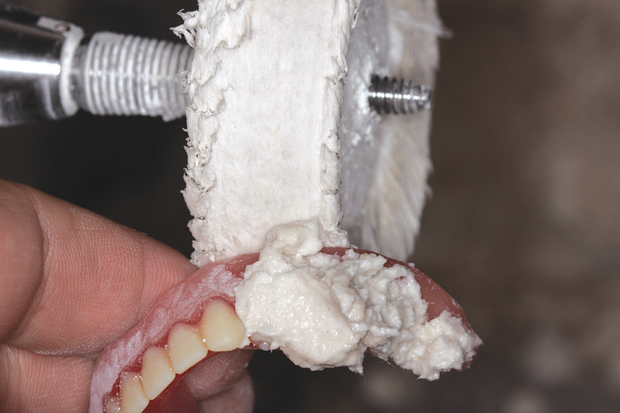
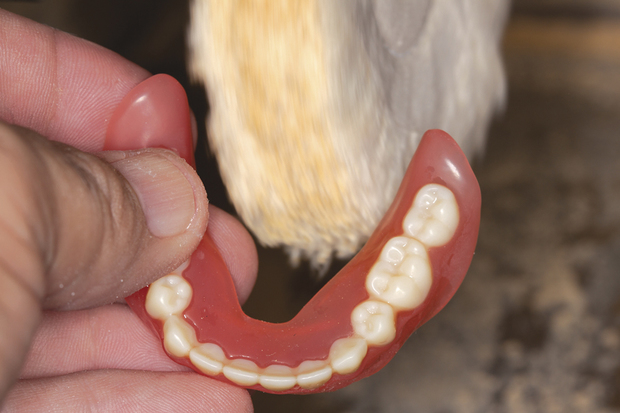
Step 10 - Gently snap off the support material from the denture base and teeth with your fingers. Smooth and contour the small nibs from the supports on the base and teeth so that the printed teeth fit precisely into the denture base sockets. I use carbide burs, rubber points and wheels, and Scotch Brite wheels.
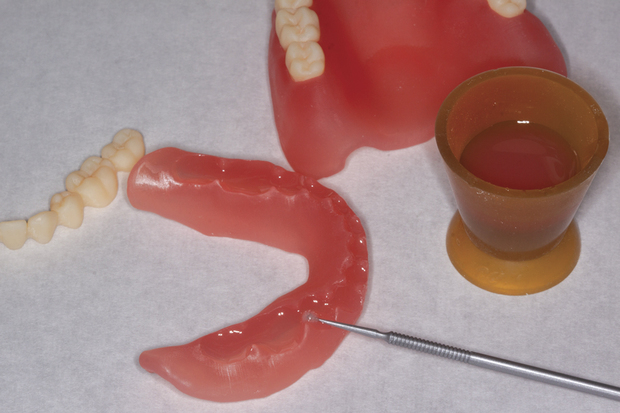
Step 11 - Using Dentca Denture Base Resin material, light-cure bond the printed teeth and denture base.
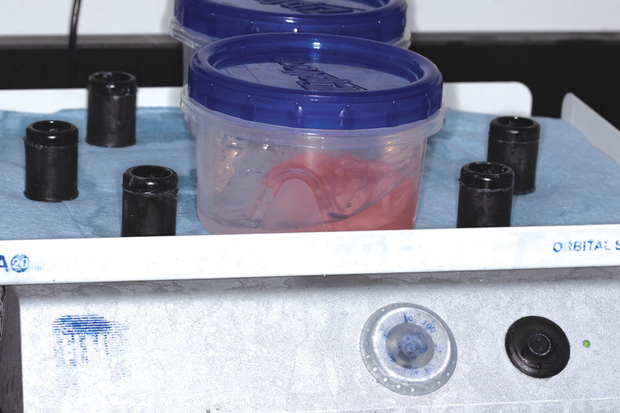
Step 12 - IMPORTANT: The final curing of the printed denture should be done in a glycerol bath in the Uvitron UV Intelliray 600 curing unit. In order to be FDA compliant, you must follow Whip Mix’s validated processing method precisely.
Step 13 - Finalize the prosthesis using pumice and a high-shine compound (you can use your preferred analog procedures).
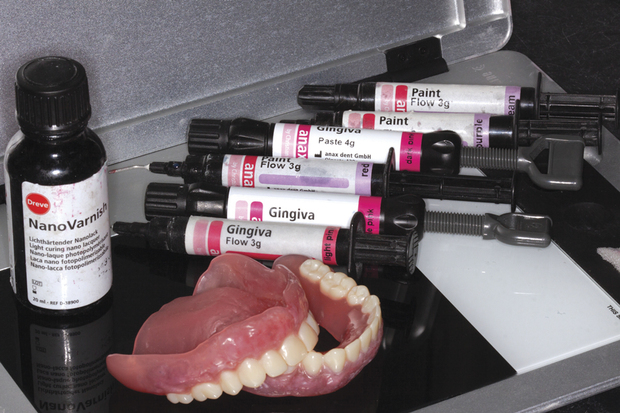
Step 14 - This is an optional step: to enhance the esthetics, I use Anaxgum and Anax Paint Flow to tint the denture base, GC Opticolor Glaze to characterize the teeth and base and Dreve Nano Varnish to glaze and seal the composite layering. These products are from anaxdent North America, GC America and Dreve respectively.
Final Result - Thanks to the new era of digital dentures, long-time removable technicians are learning new techniques, saving time and offering an esthetic prosthesis.

Article
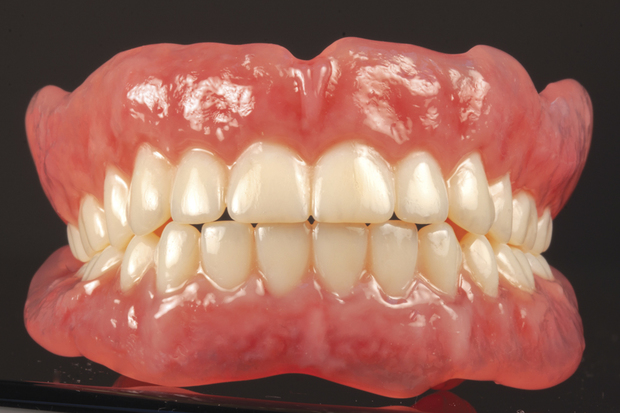
Mark Williamson, CDT, DTG, explains how he prints a complete denture using the Asiga Max printer system from Whip Mix.

Author
Mark Williamson
Clinical Lab Manager at Bay Lakes Center for Complex Dentistry · Green Bay, WI

Subscribe to LMT Magazine. It's FREE to U.S. addresses.


February 2020
Browse all articles from the February 2020 issue of LMT Magazine
-
Simpson Dental Trendz: Bonding Through Service and Education
Leslie Gaynor · I Want to Work in That Lab · Aug 2025
Lee’s Summit, MO; 29 employeesOwner: Paul Simpson Paul Simpson, the Owner of our lab, is committed to giving back: he’s an active supporter...
Bellevue, WA; 66 employeesOwners: Kaila and Megan Nakanishi When my mother-in-law was diagnosed with stage 4 cancer, it was a very difficult time for...
East Coast Excellence: You're Cordially Invited...
Kelly Fessel Carr · Publisher's Page · Aug 2025
…to attend LMT’s 25th annual LAB DAY East, the largest dental laboratory technology show in the Northeast. Join us on Saturday, September...
Smart Redesign Delivers More Space in Same Footprint
Kim Molinaro · Inspiring Interiors · June/July 2025
Instead of building a costly addition to its Maumee, OH, facility, Lantz Dental Prosthetics worked with an architect to create a better layout within its...
Here are eight strategies for ensuring a safer environment for your business.