
STEP 1
After receiving an impression/model, bite registration and Rx from the dentist, and mounting the case on an articulator, create a silicone index from the incisal border of the maxillary occlusal bite template to obtain the occlusal plane, midline, vertical dimension and alignment of the centrals. Use the dentist’s occlusal rim to determine the initial placement of the maxillary central incisors. I selected Nobilium’s Nobildent denture teeth because they’re esthetic, extremely wear resistant and the posteriors have a built-in pocket to help with mechanical retention. They also feature a no-wax tooth card that saves time because I don’t have to wipe soft carding wax off the teeth.
STEP 2
In order to follow the lower occlusal plane, position the OMP on the mandibular working model at the upper two-thirds of the retromolar pad area and hold it in place with your fingers. The pointed end is at the back of the model and you’ll use the OMP in this same position through step 8. Position the teeth so the incisal edges rest on the flat plane of the OMP.
STEP 3
Position the lateral incisors with the incisal edge raised approximately 1mm from the OMP.
STEP 4
With the incisal tips touching the flat plane of the OMP, place the canines and tilt the cervical third buccally to give them prominence. Rotate the canines so the distal faces are toward the maxillary tubercles.
STEP 5
Place the maxillary first premolar with its long axis at a right angle to the OMP and with the buccal and lingual cusps in contact with the plane.
STEP 6
Place the maxillary second premolar in the same manner, with its long axis at a right angle to the OMP and the buccal and lingual cusps in contact with the OMP. Then align the facial surfaces of the premolars and the canine using the OMP as a straightedge (shown here).
STEP 7
To set the maxillary first molar, position the mesiobuccal and mesiolingual cusps so they touch the OMP, then raise the distobuccal cusp approximately 0.75mm and the distolingual cusp approximately 0.5mm above the OMP.
STEP 8
Set the maxillary second molar with the mesiobuccal cusp approximately 1mm above the OMP and the other three cusp tips about 1-1.5mm above the OMP. Use the OMP as a straightedge (shown here) to be sure the buccal ridges of the molars are aligned and angled slightly inward from the facial surfaces of the canine and two premolars.
SETTING THE MANDIBULAR DENTURE TEETH
STEP 9
Guide the mandibular first molar into the correct occlusal relationship with the maxillary first molar and maxillary second premolar. The mesiolingual cusp of the upper first molar should seat squarely in the central fossa of the lower first molar.
STEP 10
Place the lower second molar so the mesiobuccal inclined plane contacts the marginal ridge of the distobuccal cusp of the upper first molar in centric occlusion.
STEP 11
Set the mandibular second premolar so the tip of the buccal cusp contacts the mesial marginal ridge of the upper second premolar.
STEP 12
In centric occlusion, position the lower first premolar with the tip of the buccal cusp in contact with the mesial marginal ridge of the upper first premolar.
STEP 13
To balance and align the mandibular anterior teeth, use the OMP as a horizontal plane to be sure the incisal edges of all the lower anteriors touch the OMP. This photo shows the facial view of the lower anteriors following the respective long axis.
THE FINAL RESULT
The final waxup with Nobildent acrylic teeth; note the natural gingiva contouring.
For more information on the OMP, contact Kolbeck at 941-794-0838 or [email protected]. For more information on Nobildent acrylic teeth, visit http://nobilium.com.

Article
The use of an occlusal template is fundamental for setting up denture teeth. Josef Kolbeck developed his own tool called Occlusal Measurement Plane. Here's how he uses it to achieve a balanced and esthetic denture setup.

Author
Josef Kolbeck
Dental Technology Consultant at Kolbeck Dental · Naples, FL
Kolbeck is part technician, part innovator: he continually tests new materials and techniques to improve the lab's fabrication processes and has created many original techniques, including the Kolbeck Technique featured in the March 2012 issue of LMT.
Subscribe to LMT Magazine. It's FREE to U.S. addresses.

November/December 2017
Browse all articles from the November/December 2017 issue of LMT Magazine


-

Tobie Dunlap
Lab Technician at Radiant Dental Laboratory, Inc · Merrillville, IN
-

Martin Pedro Gamez Hernandez
Prostodontic at Consultorio Dental · Matias Romero Avendano, Mexico
-
Dr. Hui Kim, DMD
Dentist at Hui J. Kim, DMD · Saratoga, CA
-
Ian Taylor
Clinical Dental Technician at Ian Taylor Creating Smiles · Birmingham, United Kingdom
-
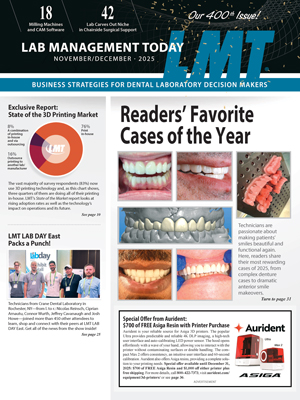
Readers' Favorite Cases of the Year
LMT Communications, Inc. · Labs & Profiles · November/December 2025
Readers share their most rewarding cases of 2025, from complex denture cases to dramatic anterior smile makeovers.
Adoption of 3D Printing on the Rise, Especially Among Small Labs
Kelly Fessel Carr · LMT Surveys · November/December 2025
LMT's annual 3D Printing Survey Report looks at the state of the market and where it's headed.
Novo Dental Lab Carves Out Niche in Chairside Surgical Support
Laurel Carbonneau · Labs & Profiles · November/December 2025
The entrepreneurial spirit is alive and well in our community. In Part III of our series on startup labs, we talk with Fernando Pedraza, CDT, Novo Dental...
When Printing Gets Playful
Kelly Fessel Carr · Publisher's Page · November/December 2025
This issue features our annual State of the 3D Printing Market Report, offering a look at adoption rates, how the technology is impacting production and...
9 Business Apps that Save Time and Simplify Operations
Kelly Fessel Carr · Management · Oct 2025
Explore the apps that laboratory owners use to simplify the daily grind, enhance communication and keep their businesses running smoothly.