
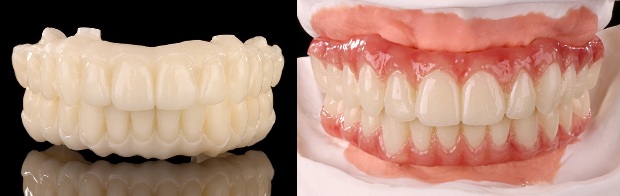
The happy patient with her biocompatible, esthetic Prettau Zirconia bridges.

Figure 16:
The finished Prettau Bridges were tried on the master cast and sent to the dentist for delivery.
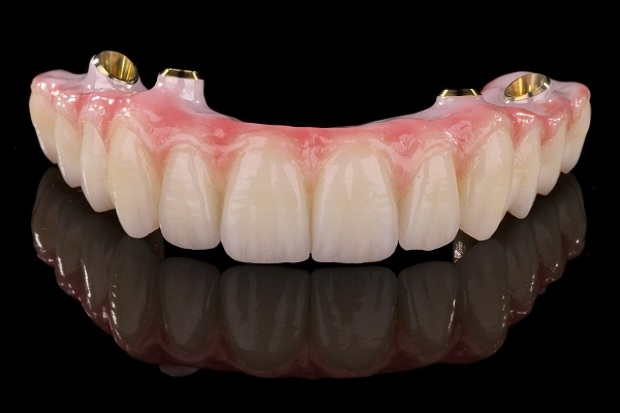
Figure 15:
After steam cleaning, the titanium bases in the maxillary bridge (shown here) and the titanium bar in the mandibular bridge were bonded to the zirconia structures with self-adhesive luting composite.
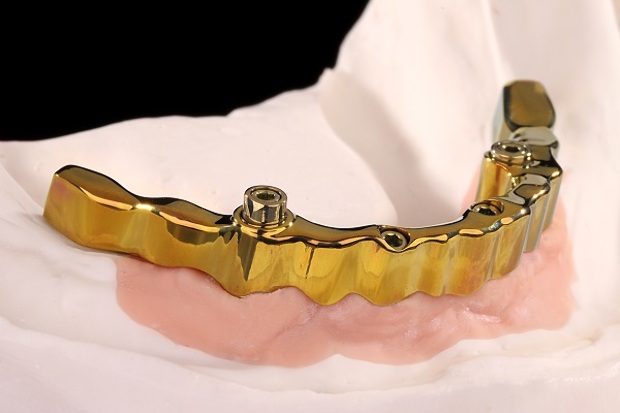
Figure 14:
Since the titanium bar gave the restoration a high value and gray hue, the bar and attached titanium bases were anodized with Titanium Spectral Colouring Anodizer to produce a biocompatible, gold-colored oxide layer with a warm tone.
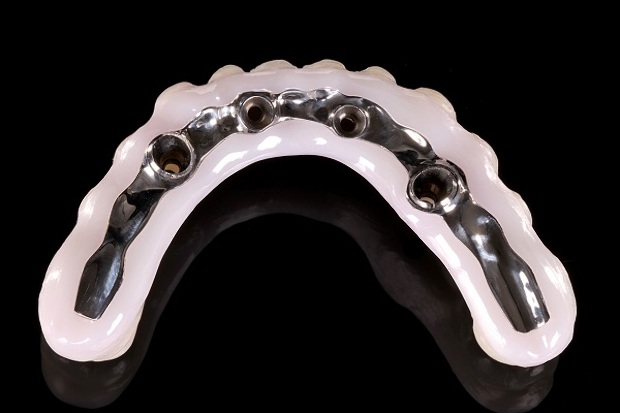
Figure 13:
The fit of the titanium bar was tested in the maxillary bridge. Once the fit was confirmed, the gingival area and the anteriors were veneered with ICE Zirconia ceramic. In the anterior region, only vestibular ICE Zirconia dentines, effects and incisals were used; the incisal edge remained unveneered to avoid chipping. After stain and glaze firings, the restoration was complete.
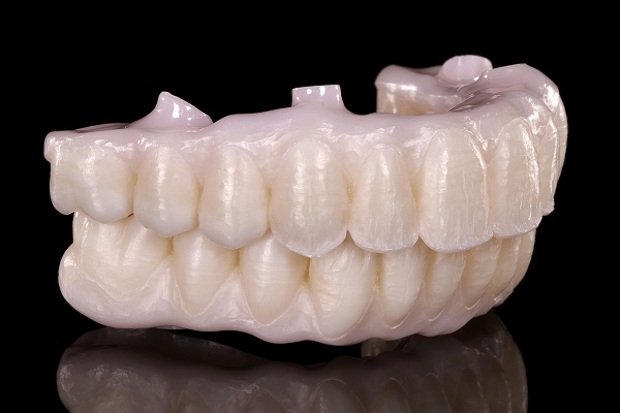
Figure 12:
After sintering in the Zirkonofen 700 oven, the Prettau Zirconia bridges exhibited natural esthetics and high translucency.
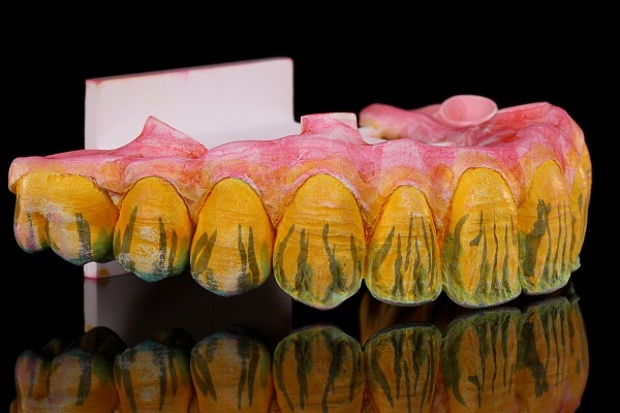
Figure 11:
For a natural color, the restorations were brush-painted with acid-free Colour Liquids Prettau Aquarell; each stroke was manually applied with a thin brush and then the restorations were placed under a drying lamp. For visual aid, the liquids contain special bio-pigments that help in realistic shade distribution and color grading. Individual custom coloring of finer details such as mamelons, cervical or interproximal areas is considerably easier and can be performed with pinpoint precision.
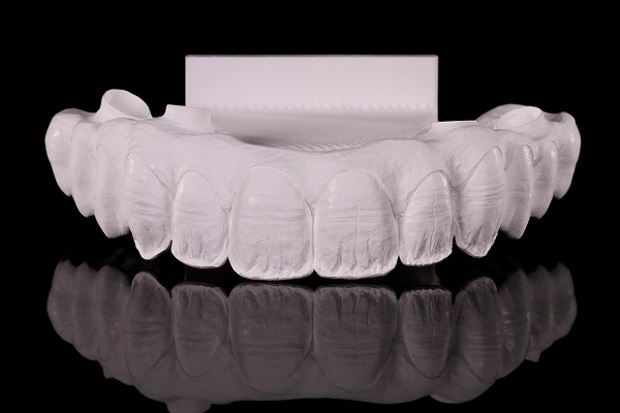
Figure 10:
In preparation for the anterior porcelain veneer, the zirconia bridge was manually cut back and characterized. The incisal edge of the maxillary bridge retained its full anatomic contour in the functional loading area, protecting the edge and preventing chipping.

Figure 9:
After some minor adjustments, the restorations were milled in Prettau Zirconia with the M5 milling unit using the simultaneous 5-axis processing in combination with a 0.3 C milling bur that milled the extra-fine details.
Figures 7 & 8:
The bar was scanned and the mandibular bridge designed on screen. To ensure adequate fit, function, esthetics and phonetics, temporary bridges were milled from Temp Basic resin (left photo) and veneered with gingival composites (right photo). The titanium bar and temporaries were sent to the dentist for the try-in
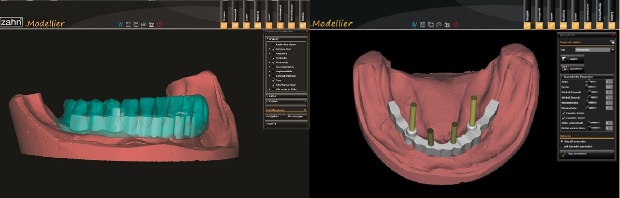
Figures 5 & 6:
Next, to determine the optimal position of the titanium support bar and define the emergence profile, the mandibular digital waxup was displayed on screen (left photo). The corresponding implant types in the software library were used to plan the bar construction that would be directly screw retained on the implants (right photo). The software stores all files as open .stl files, which can be easily exported.
The bar and connectors were then milled in titanium using the M5, a 5+1-axis simultaneous milling unit, and the bar was polished. Before designing the mandibular bridge, the fit of the milled titanium bar was examined on the master cast.
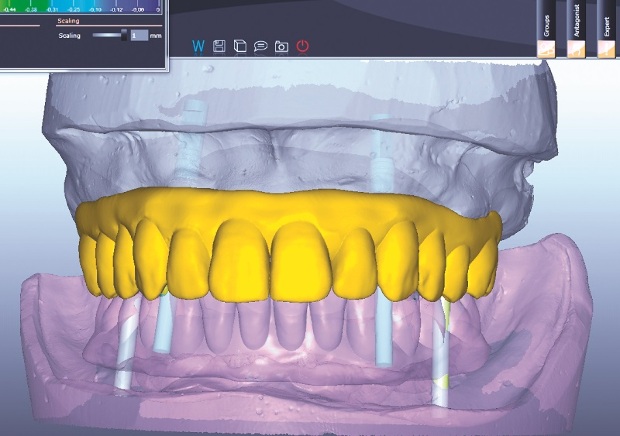
Figure 4:
A digital waxup of the maxillary bridge was created using the Zirkonzahn. Modellier software and its “Heroes Collection” tooth set library (the software also offers a wizard with step-by-step design instructions). The customized titanium bases were modified on screen to optimize the orientation of the screw-access channels. The software then analyzed the digital waxup situation and adapted it to the gingival and implant geometries.
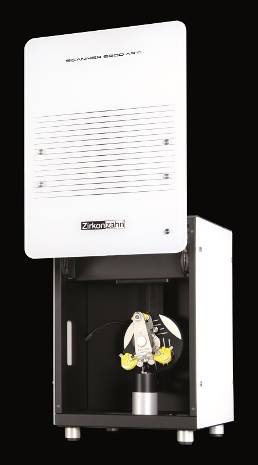
Figure 3:
At the laboratory, the working casts were poured from the impressions, placed in the articulator and scanned using the fully automated, optical structured light scanner S600 ARTI. The software uses the articulator scan to determine the jaw relations and align the casts in perfect occlusion, allowing the identification and elimination of static and dynamic premature occlusal contacts.
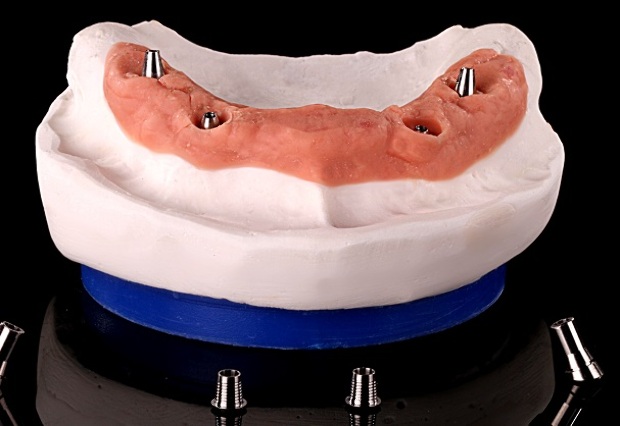
Figure 2:
To support the maxillary bridge, four implants with titanium bases were placed at sites #4, #6, #11 and #13. The mandible (shown here) received implants at sites #20, #23, #26 and #28 and, since there were only four implants and an extensive distal edentulous space, the team decided to use a titanium bar to guarantee bridge stability.
The team was convinced that the esthetics and handling benefits of zirconia coupled with titanium’s high flexural strength would result in strong, esthetic and biocompatible restorations.
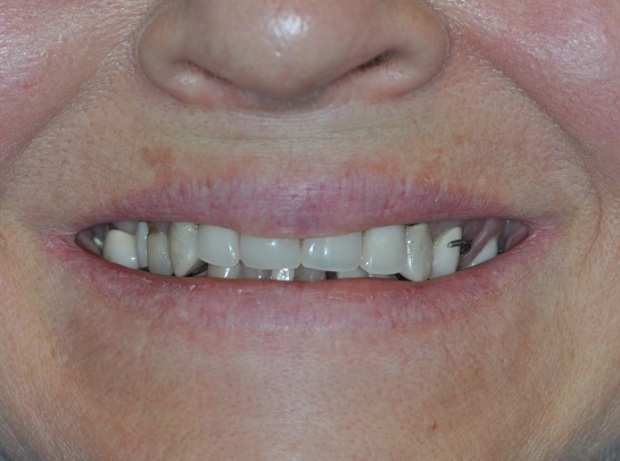
Figure 1:
The patient had conditionally removable dentures retained with metal clasps and wanted a more esthetic, fixed restoration. Her atrophied mandible presented a major challenge.
The dental team—including Drs. Fernando Rojas-Vizcaya and Homayoun Zadeh, and Georg Walcher, MDT—decided to restore her smile with eight implants, four upper and four lower, and fixed, metal-free suprastructures. Due to the limited bone available, the team chose occlusally screw-retained Prettau Bridges—fully anatomical restorations made with translucent Prettau Zirconia that are ideal for implant-supported restorations, limited-space situations and restorations with a gingival flange.

Article
Zirkonzahn’s Georg Walcher, MDT, offers his step-by-step technique for rehabilitating an edentulous patient with implants and fixed Zirconia Prettau Bridges.

Author
LMT Communications delivers the business strategies, information, dental laboratory news and education that dental laboratory decision-makers need to succeed. In Print. In Person. Online.

Subscribe to LMT Magazine. It's FREE to U.S. addresses.


January 2014
Browse all articles from the January 2014 issue of LMT Magazine
-

Crown and Bridge
Fields · 4,953 subscribes
-

Zirkonzahn USA, Inc.
Company
-
LAB DAY West WOWs with Camaraderie, Collaboration and Cutting-Edge Technology
LMT Communications, Inc. · Post-Show Coverage · June/July 2025
Last weekend in sunny California, more than 1,600 dental laboratory owners, managers, technicians and dentists joined LMT for LAB DAY West, the largest...
In this case study of a smile makeover for a young police officer, Lab Owner Jillian Swafford demonstrates how expertise and proper materials can bring monolithic zirconia to life.
From holograms to hyperspectral imaging, this year's International Dental Show in Cologne, Germany did not disappoint. Read our complete coverage.
Key Trends at IDS 2025: 3D Printing, Chairside Solutions and Patient Education
Kelly Fessel Carr · Publisher's Page · May 2025
Managing Editor Kim Molinaro and I had an amazing time at the IDS in Cologne, Germany, in March. Our goal—admittedly a lofty one—was to visit...
More than 60 dental professionals from 10 countries participated in Candulor’s prestigious 14th KunstZahnWerk (KZW), each fabricating an age-appropriate,...