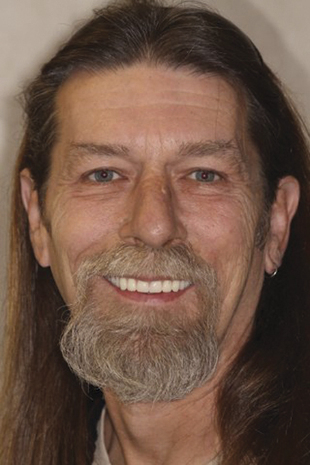
Before
Step 1:
Dr. Yaste selected the appropriate size of the LowerKEY based on the size of the patient’s arch according to the old dentures.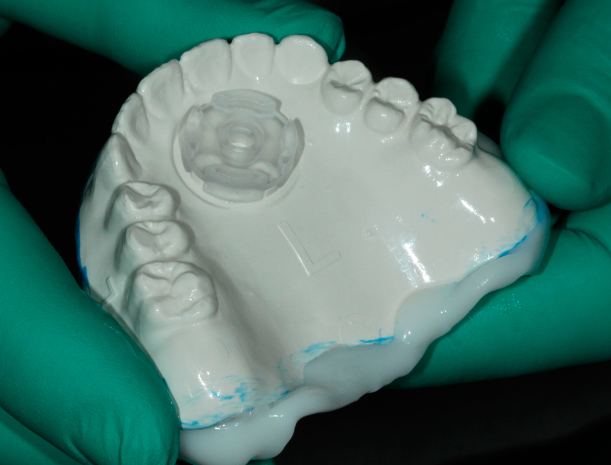
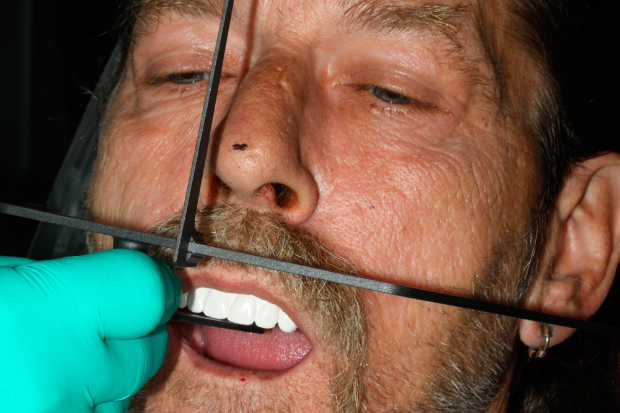
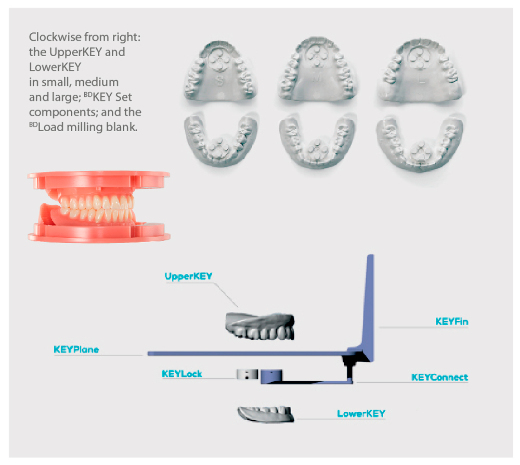
With the BDKEY Fin and BDKEY Plane in place, Dr. Yaste established correct vertical dimension and took impressions with the UpperKEY and LowerKEY, which were used as impression trays.
With the BDKEY Fin still in place, he checked the frontal view, including esthetics and the length and visibility of the anterior teeth. Using the BDKEY Plane, he checked the center of the face and the parallelism of the arch to the pupillary line. From the sagittal view, he used the BDKEY Plane to check the parallels of Camper’s plane. He also took photos to assist the laboratory with design and fabrication and selected the appropriate tooth shade; he then manually noted all relevant details in the BDS Checklist, which ensures all data is transferred to the laboratory.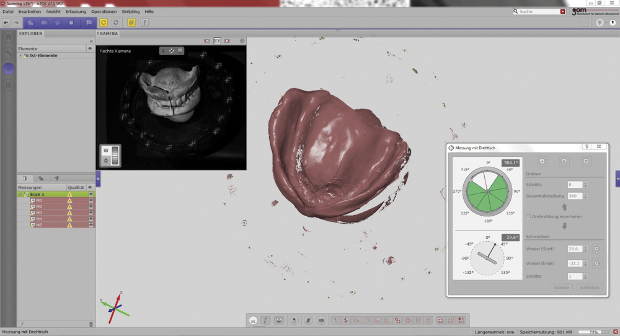
Step 2:
At the lab, Silvio Schneider, MDT, scanned both the UpperKEY and LowerKEY impressions and the BDKEY Set bite-registration with GOM‘s Atos Core 135 (any extraoral open scanner can be used). The scans were imported into the BDCreator software and combined to make a virtual 3D model of the BDKEY, making it possible to record the BDKEY completely even in scanners with limited scan volume.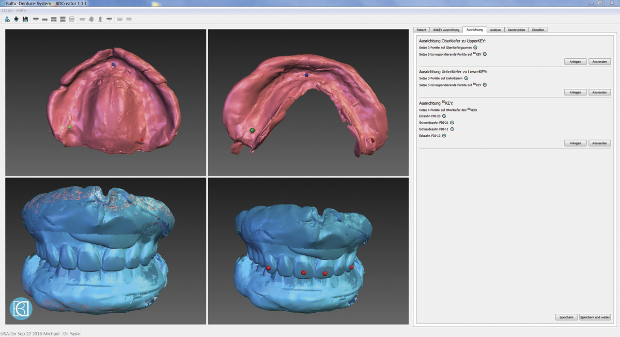
The data of the UpperKEY and LowerKEY impressions were matched by means of three reference points to the BDKEY bite registration scan and then located in relation to the recorded data of the patient.
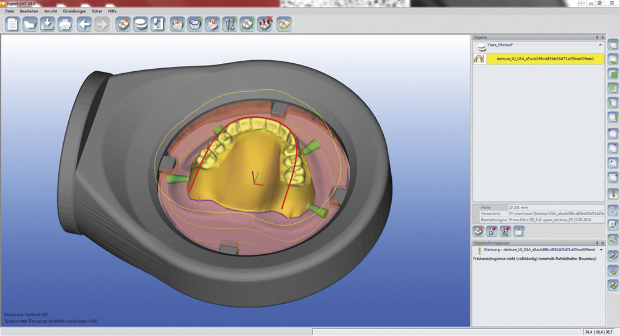
Step 3:
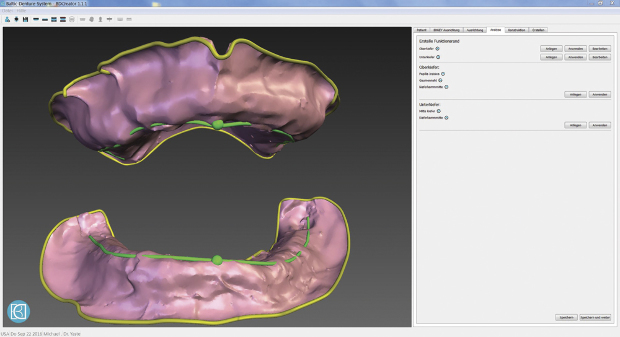
Schneider manually marked the functional edges and reference points—including the palatal suture, middle of the ridge and the papilla incisiva—which were set to align the rows of teeth. Depending on the CAM system used, these points may also be used to generate the milling paths.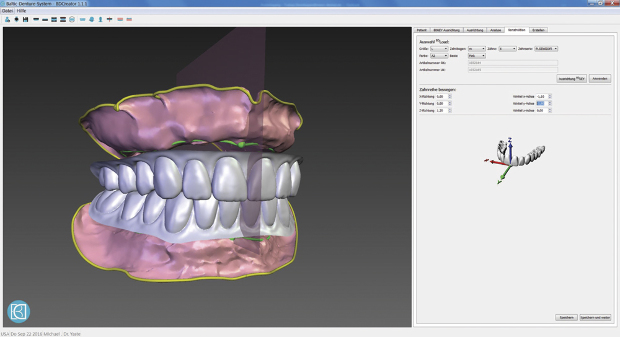
Step 4:
In the Design tab of the BDCreator software, the rows of teeth matching the BDKey were automatically selected and set to the position specified. In this case, BDLoad size “L” with jaw width “M” was selected. If desired, the automatically suggested BDLoad size can be replaced with any other size and the rows of teeth can be moved and rotated freely.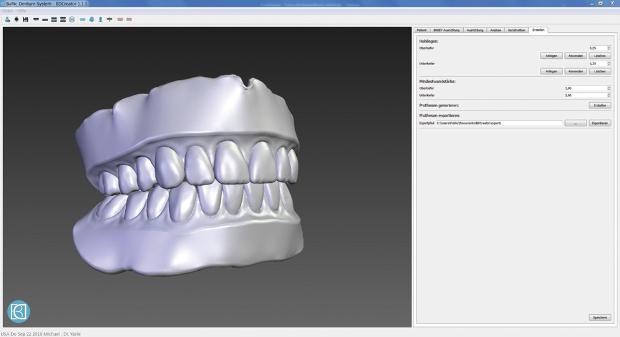
Step 5:
The BDCreator CAD software automatically generated the denture base design with a pre-set wall thickness of 2mm (this can be increased if desired, and the technician can also manually define areas where the base should be hollow, for example, if additional space is needed on the papilla incisiva area).
Schneider exported and transferred the .STL file to Follow-Me’s hyperDENT CAM software (SUM3D software can also be used) and selected the appropriate milling machine and BDLoad blank.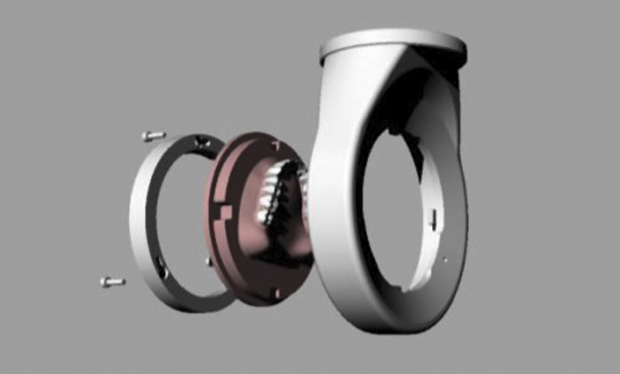
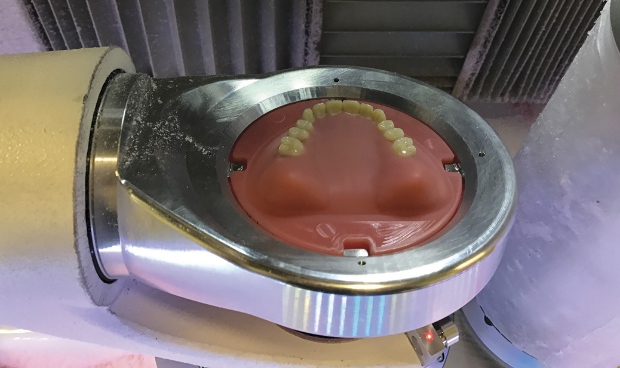
Step 6:
Schneider positioned the BDLoad in the BDLoad blank holder of the Primacon 5X milling machine (other five-axis milling machines can also accommodate BDLoads). The milling time was approximately 100 minutes. Since there is no polymerization shrinkage, milling results in a significantly better fit compared to conventional techniques.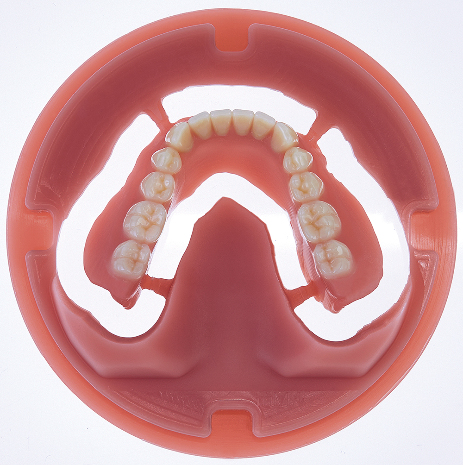
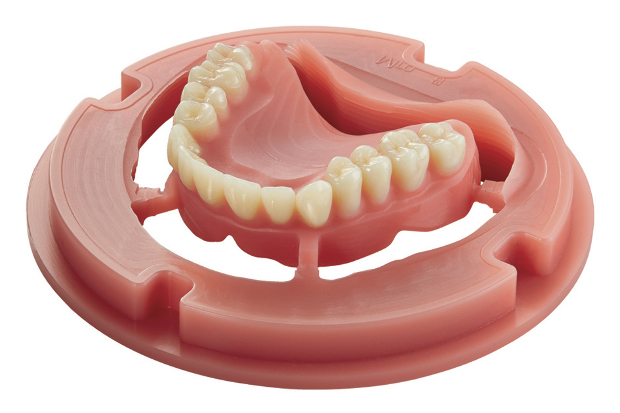
Step 7:
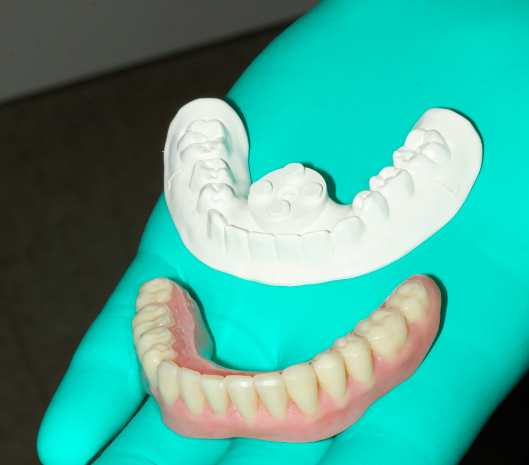
Schneider removed the upper and lower BDLoad from the milling machine.
He separated the dentures from the BDLoad using a rotary instrument and finished and polished using conventional techniques. Since the transition from the gum to the tooth was already completed, finishing was very quick.
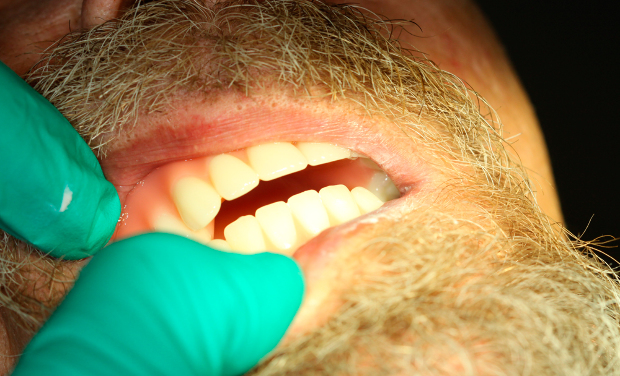
Step 8:
At the second appointment, Dr. Yaste tried the dentures in the patient’s mouth and made minor adjustments. The fit was excellent and occlusion was modified very slightly. The patient reported no chemical taste.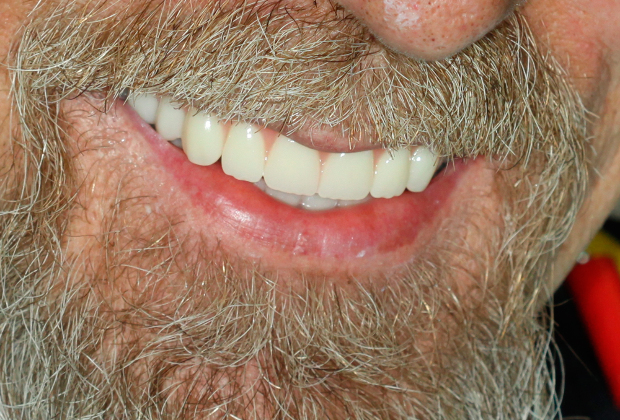
Final Result:
The patient was seen for follow-up appointments the next day and three weeks later, when another small adjustment was made to reduce slight over extension of a flange. At the six-week follow-up, he reported excellent fit with great suction. Phonetics were better than with the original immediate dentures and he was very pleased with the esthetics, the ease of cleaning and the convenience of receiving the final dentures in only two visits.
Contact Information: Call +49 4381 4030 or visit www.baltic-denture-system.com.

Article
Dental Team: Dr. Christian Yaste, DDS, Ballantyne Center for Dentistry, Charlotte, NC, and Silvio Schneider, MDT, Dental Design Schneider GmbH & Co. KG, Waldenburg, Germany. Restorative Challenge: Dr. Yaste first saw the patient five years...

Author
Maribeth Marsico
Senior Editor at LMT Communications, Inc. · Cheshire, CT
A 30-year veteran of the editorial department, Maribeth loves getting to the heart of the story. She especially enjoys creating and analyzing reader surveys and staying in touch with our readers.
Subscribe to LMT Magazine. It's FREE to U.S. addresses.


March 2017
Browse all articles from the March 2017 issue of LMT Magazine
-

Merz Dental GMBH
Company
AvaDent Digital Denture and Implant Solutions from AvaDent
Maribeth Marsico · 4 Ways to Fabricate Digital Dentures · Mar 2017
Dental Team: Drs. Jeff and Burt Melton, who have practice locations in Santa Fe and Albuquerque, NM. Restorative Challenge: The patient presented with severe periodontal problems and bone loss...
Ceramill FDS System from Amann Girrbach
Maribeth Marsico · 4 Ways to Fabricate Digital Dentures · Mar 2017
For the slideshow version, scroll to the bottom or click here. Dental Team:...
My Digital Denture from Heraeus Kulzer
Maribeth Marsico · 4 Ways to Fabricate Digital Dentures · Mar 2017
Dental Team: Gil Guardiola, CDT, Removable Department Technical/Clinical Manager at R-dent Dental Laboratory and Dr. Micah Parkhurst, both in Memphis, TN. Restorative Challenge: The patient...
