Final Results: The completed case was seated in the mouth. Although there is still a small space between #24 and #26, the patient was extremely satisfied with the look and feel of his new teeth.
For more information about Dentsply Sirona CAD/CAM’s inLab® SW 15, call 855-INLAB4U or visit www.inLab.com.
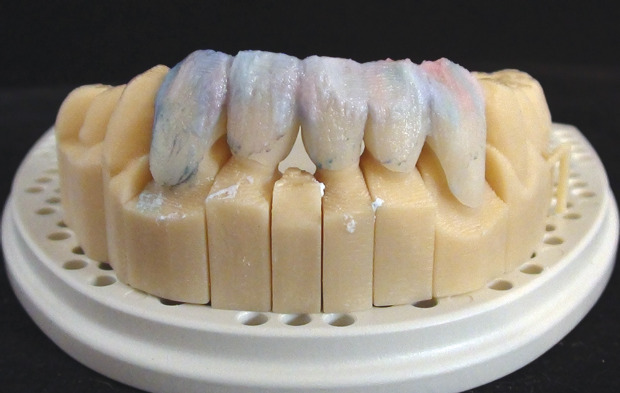
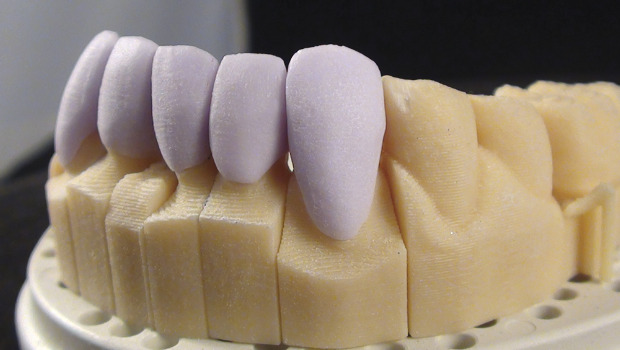
I applied a wash layer and started layering the enamels using Neutral, TI2 and Clear e.max Ceram enamels from Ivoclar. I mixed Vis-á-Vis® colored markers into the different enamels to help me visualize where each porcelain was actually layered.
I fired the units in the Programat CS using the e.max Ceram first-bake cycle.
I meticulously refined the contours and did a second porcelain bake cycle. I glazed the restorations and checked them on the model to make a final assessment of the contacts.
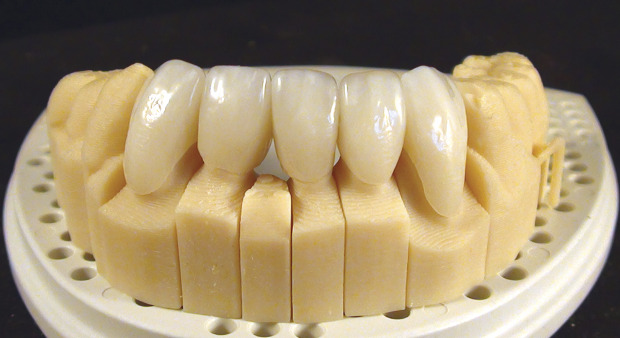
I steam cleaned each restoration inside and out, filled the inside with peg putty and crystallized them in the Ivoclar Programat CS oven.

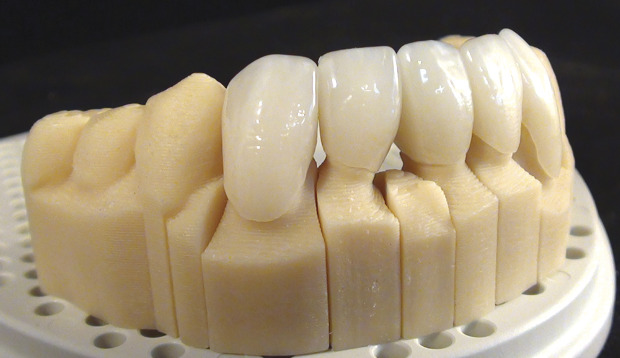
I refined the contours and line angles and cut them back manually as needed with a handpiece.
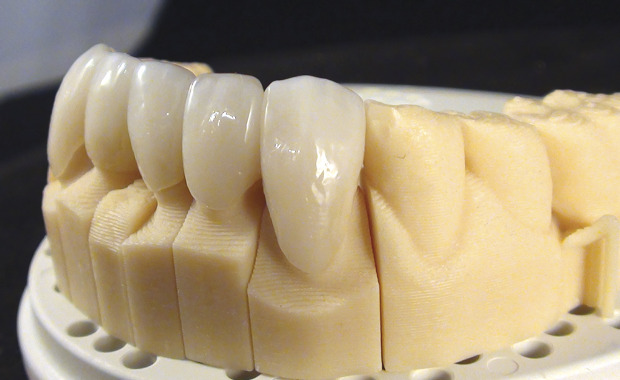
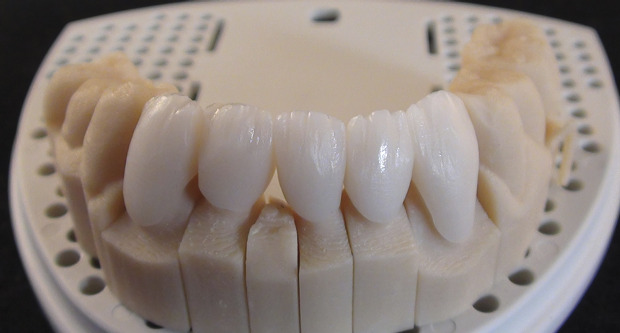
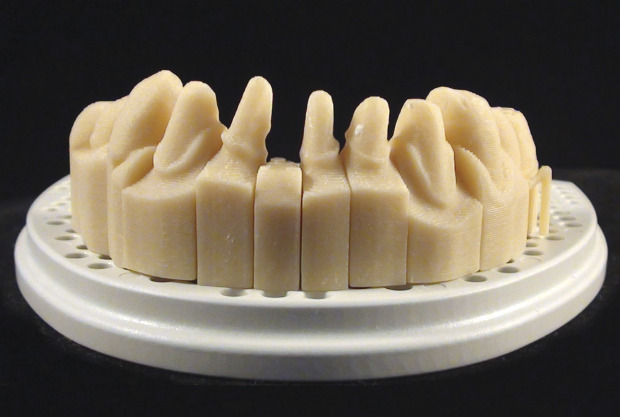
After I milled the five restorations in the inLab® MC XL, I checked the fit on the model.
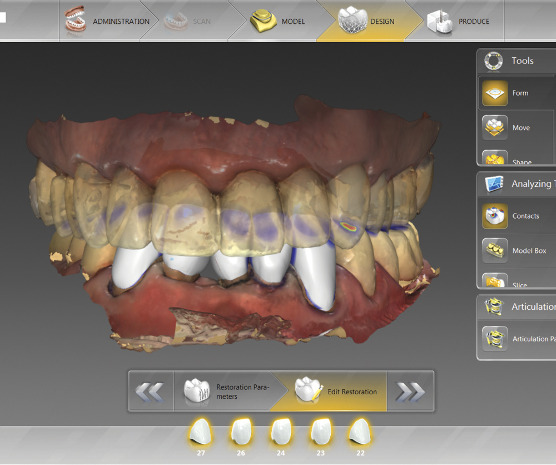
To evaluate the restorations, I turned on the Bio-copy file and the software “stitches” it with the design file; this enabled me to verify how well the Bio-copy and final proposal meshed together. I also checked for proper contacts and bite, and the design was exactly what I envisioned. It was an extremely efficient design process.
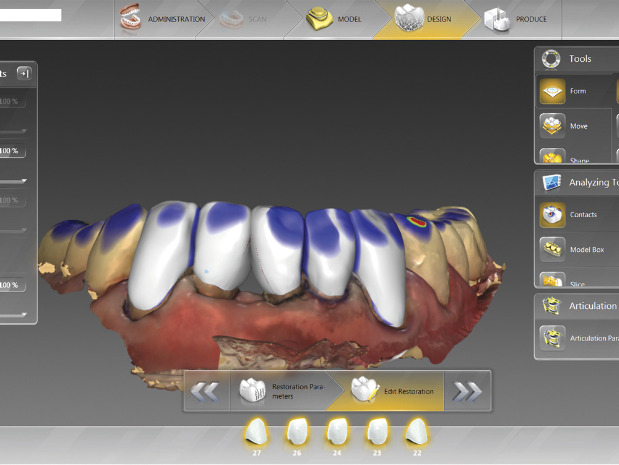
The software generated the final design proposal. (I didn’t cut it back directly in the software, although that’s an option.)
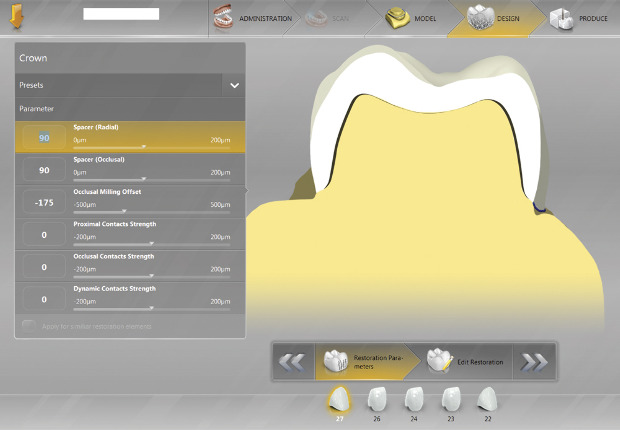
I doublechecked the parameters to ensure I followed the doctor’s preferences.
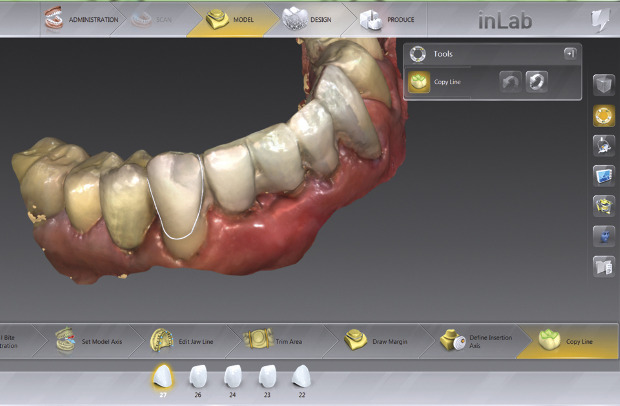
Having used the temps made from the diagnostic waxup, the software then created the Bio-copy lines to give me an approximate outline of the restoration surfaces to be copied; I edited those lines to my satisfaction.
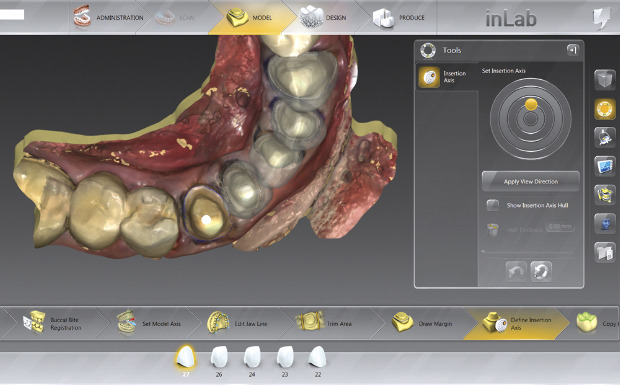
I assigned the insertion axis.
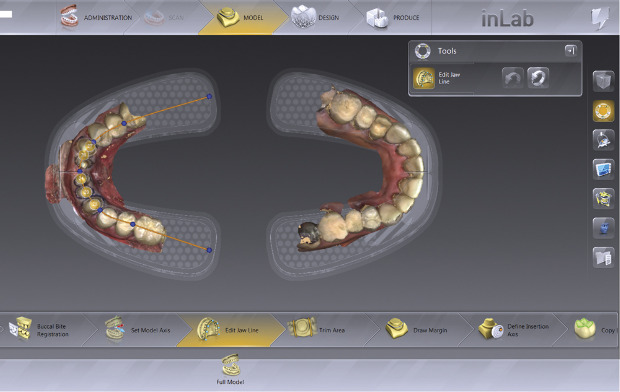
I set my model in the Edit Jaw Line phase to make sure the arch was aligned correctly and the restoration numbers were hovering over the preps in the correct position.
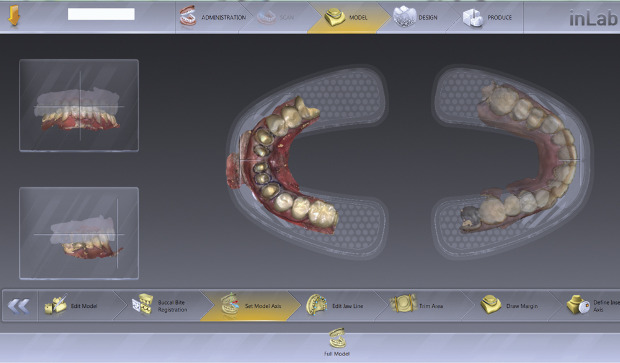
I made sure all the data was correct on the administration page and that the doctor chose the correct type of restoration and material. I established the model axis.
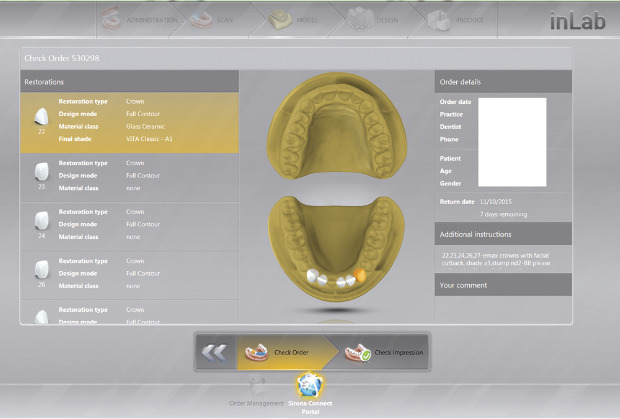
I verified the scan and that all the necessary elements and information for the case were provided, accepted the case and immediately ordered a working model from infiniDent, Dentsply Sirona CAD/CAM’s centralized service partner.
I started the case in the Bio-copy function in inLab SW 15. Instead of using libraries and databases of standard teeth, the Bio-copy function copies the features of the patient’s intact teeth, the temporary restoration or a diagnostic waxup to create anatomically correct crowns, inlays, onlays, veneers and bridges in a fully automated manner.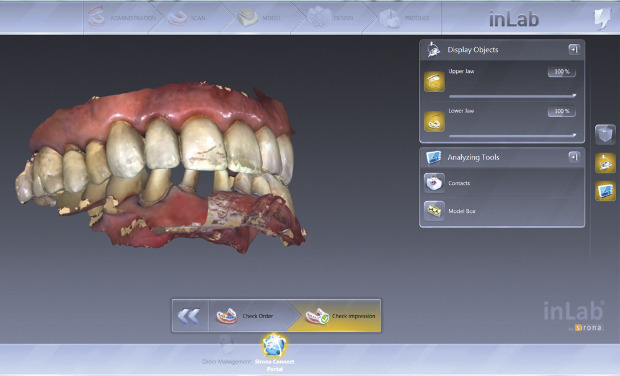
I reviewed the case for any imperfections or missing data.
When I received the case, I got an email and also a notification on my iPhone app. I downloaded the Sirona Connect order and analyzed the case details.

Article
Laboratory Owner Bill Atkission explains how the Bio-copy function of inLab SW 15 copies the patient’s intact natural teeth, the temporary restoration or a diagnostic waxup to create anatomically correct restorations.

Author
Bill Atkission
Owner at Bella Vita Dental Design · Arden, NC
Bill Atkission has been a crown and bridge technician for more than 30 years. Beginning his career by attending the Dental Technology Institute in Orange, CA, then opening his first sole-proprietorship lab in 1989 affectionately known as Bill's Lab. Throughout...
Subscribe to LMT Magazine. It's FREE to U.S. addresses.


April 2016
Browse all articles from the April 2016 issue of LMT Magazine
-

Digital Fabrication
371 subscribes
-

Ivoclar
Company
-

IPS e.max®
Ivoclar · Consumables
-
Smart Redesign Delivers More Space in Same Footprint
Kim Molinaro · Inspiring Interiors · June/July 2025
Instead of building a costly addition to its Maumee, OH, facility, Lantz Dental Prosthetics worked with an architect to create a better layout within its...
Here are eight strategies for ensuring a safer environment for your business.
Renstrom Dental Studio: Truly a Family
Jennifer Ludwig · I Want to Work in That Lab · June/July 2025
Lino Lakes, MN; 72 employeesOwners: Randi and Scott James A third-generation, family-run business, Renstrom Dental Studio in Lino Lakes, MN, is built...
Cosmetic Dental Specialties: Quality Over Quantity
Jessie Blanchard · I Want to Work in That Lab · June/July 2025
Portland, OR; 15 employeesOwner: Brianne Lequerica-Munday When I first joined Cosmetic Dental Specialties in Portland, OR, in 2021, I was used to being...
Trains, Planes and Automobiles: The Global Impact of 3D Printing
Kelly Fessel Carr · Publisher's Page · June/July 2025
As we were organizing our Product Focus on 3D Printing Materials for this issue