
Step 14
To press, place the IPS e.max Press Multi ingot into the investment ring with the imprinted side facing up. Next, place the one-way plunger with the rounded side facing down, followed by the Alox plunger. Load the assembled ring into the press furnace, select and start the IPS e.max Press Multi program; required pressing furnaces include Ivoclar Vivadent’s Programat EP3000, 5000, 3010 and 5010.
Jeff Smith, CDT has over 34 years of experience as a technician, manager and educator. He received his training in the U.S. Air Force, earned a degree in Occupational Education from the Community College of the Air Force, and maintains certification in both C&B and Ceramics. He taught dental laboratory technology at the Department of Defense Dental Laboratory School at Sheppard Air Force Base, Texas, where he served as the Course Director. He joined Ivoclar Vivadent upon retiring from the Air Force in 1999 and is currently the Associate Manager of the Technical Services Department, responsible for education, product support/troubleshooting and research and development. Smith has lectured throughout the U.S., Canada, Europe, New Zealand and Japan.

IPS e.max Press Multi: A New Polychromatic Ingot for Pressing
Ivoclar Vivadent’s new IPS e.max Press Multi is a lithium disilicate pressing ingot for fabricating esthetic and multi-dimensional monolithic restorations without cutback or layering procedures; esthetic results are achieved in a single press sequence with subsequent glazing. The ingots feature a graduated level of shade and translucency similar to that of natural teeth: the chroma and opacity are higher in the cervical and dentin region; the incisal areas are more translucent.
With a strength of 400MPa, the material is indicated for anterior and posterior crowns, veneers and hybrid abutment crowns. The ingots are available in one size and in the following shades: A1, A2, A3, A3.5, B1, B2, C1, C2, D3 and BL2.
For information, call 800-533-6825 in the U.S., 800-263-8182 in Canada or visit www.ivoclarvivadent.us.
IPS e.max Press Multi Webinar: http://lmtmag.com/ivoclarvivadent/webinars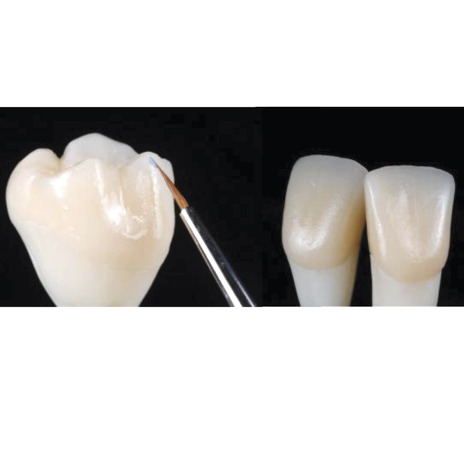
Step 17
If needed, color correct and/or characterize the restorations using IPS e.max Ceram Shades and Essence; glaze with IPS e.max Ceram Glaze.
Step 16
To rough divest, blast with polishing beads at 4 bar (58 psi) pressure until the restorations become visible. For the fine divesting, reduce the blasting pressure to 2 bar (29 psi). To remove the reaction layer that forms on the glass surface, immerse in Invex liquid for 10 to 30 minutes and then blast with 100-µm aluminum oxide at 1 bar (14.5 psi) pressure.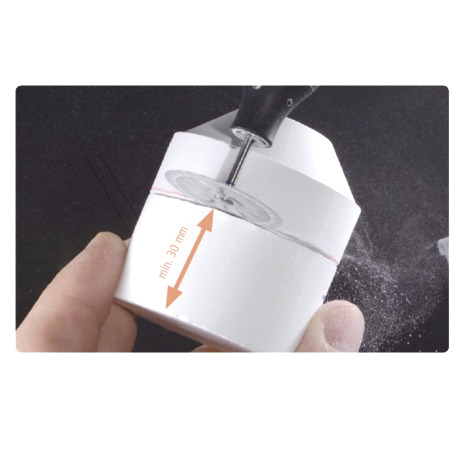
Step 15
Separate the investment ring at least 30mm from the bottom surface using a separating disk and pry it apart at this breaking point.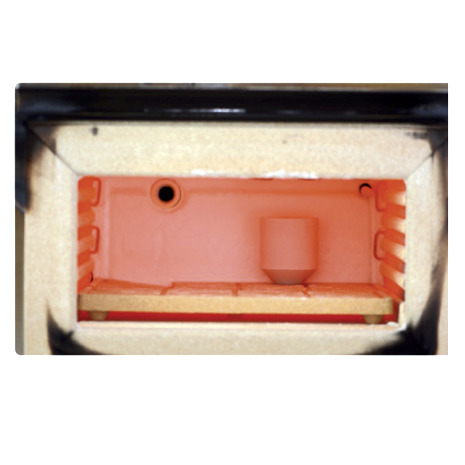
Step 13
After the appropriate setting time, place the investment ring in the preheating furnace with the opening facing down; the IPS e.max Press Multi ingot, IPS Alox Plunger and IPS Multi One-Way Plunger are not preheated.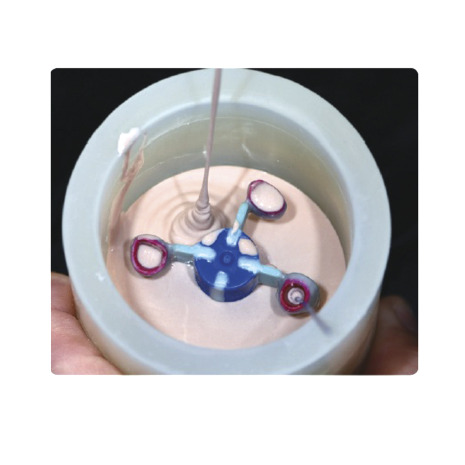
Step 12
Invest the restorations using IPS PressVest or IPS PressVest Speed, pouring the investment material slowly into the investment ring to avoid trapping air bubbles.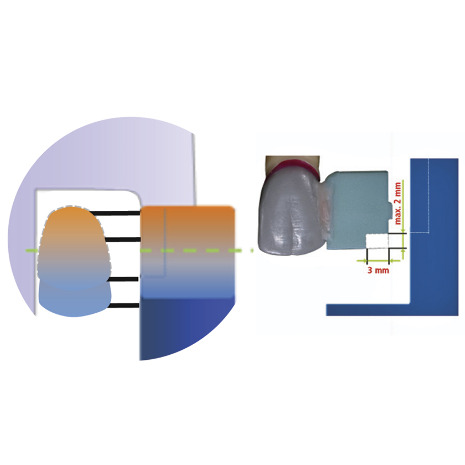
Step 11
A unique option when spruing IPS e.max Press Multi is the ability to reposition the sprued restoration on the sprue base to control translucency. If more translucency is desired, the restoration and Wax Pattern may be lowered by up to 2mm by cutting a small notch from the wax pattern.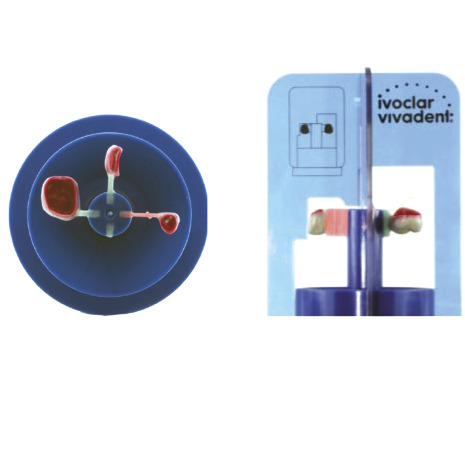
Step 10
Attach the waxups to the IPS Multi Investment Ring Base using the Wax Pattern. Check for correct positioning using the IPS Multi Sprue Guide, and seal any gaps with a small amount of wax.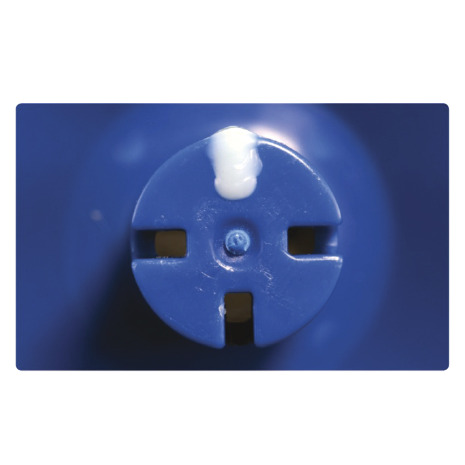
Step 9
Prepare the IPS Multi Investment Ring Base by sealing any unused opening with wax. Slightly overfill to ensure the ingot can fully seat in the sprue chamber.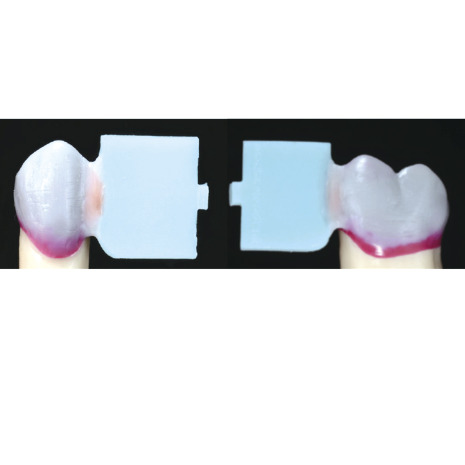
Step 8
Spruing of posterior restorations is accomplished using the same principles as anterior restorations. Note: regardless of crown height, the Wax Pattern is always aligned with the center of the restoration.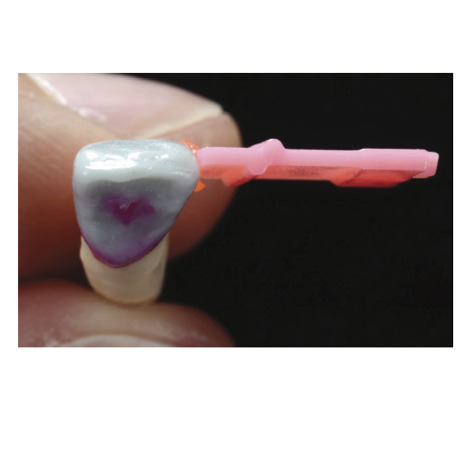
Step 7
For restorations with a delicate die, attach Shape B with its tapered side toward the incisal as an extension of the labial surface. Close the gap with a small amount of modeling wax, taking care not to add flaring or thickening at the attachment point.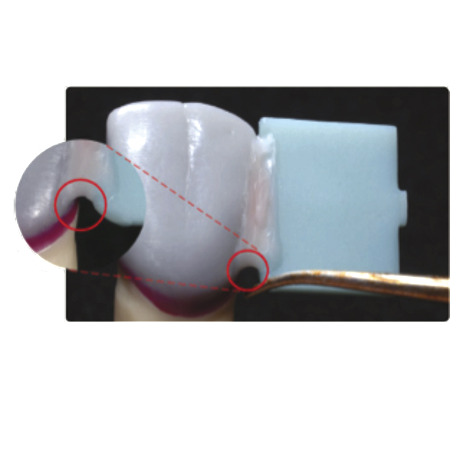
Step 6
Important note: Give the incisal and basal transition a rounded design so no sharp investment material edges are produced. If needed, round the cervical area of the Wax Pattern slightly.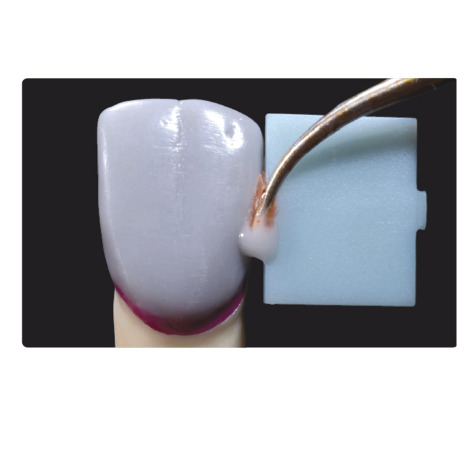
Step 5
After the correct positioning has been verified, close the gap with a small amount of modeling wax; be careful not to create flaring or thickening at the attachment point or damage the restoration margin.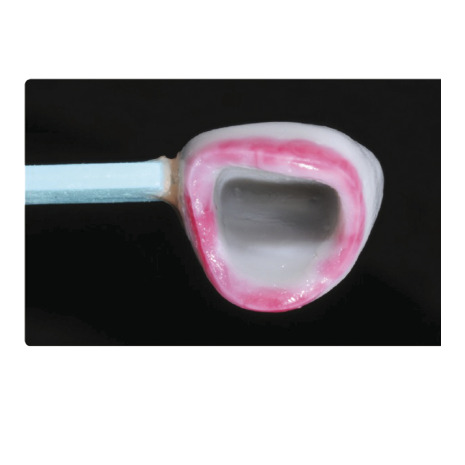
Step 4
Align the Wax Pattern with the labial surface so the ceramic flow path is not directed toward the die. This eliminates lateral pressure on the investment die and reduces the risk of the die fracturing during the pressing process.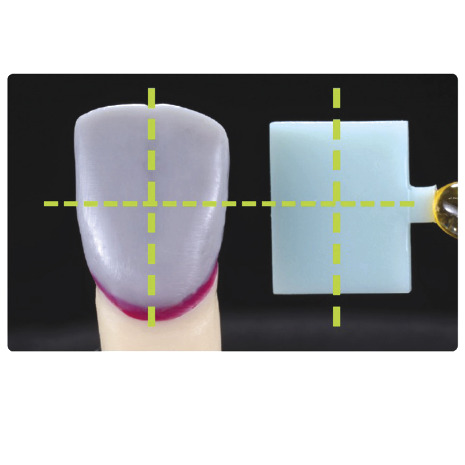
Step 3
Align the waxup vertically with the center of the Wax Pattern. The long axis of the Wax Pattern must be aligned to correspond with the long axis of the restoration; this way, the material layers maintain their horizontal relationship during pressing.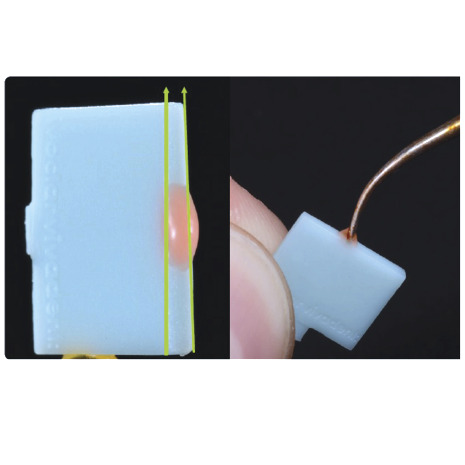
Step 2
Align the more narrow/conical side of the Wax Pattern with the occlusal and/or incisal area of the waxup. Apply a small drop of soft positioning wax on the side of the Wax Pattern to help align it correctly on the restoration.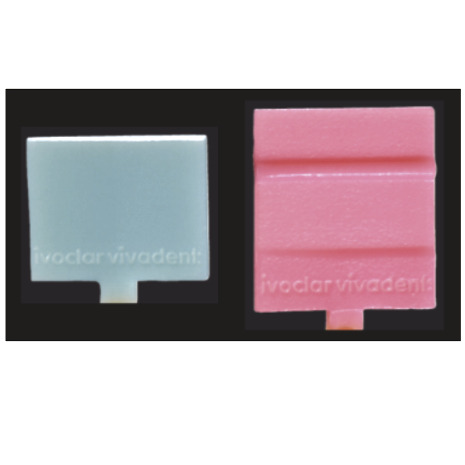
Step 1
When spruing IPS e.max Press Multi restorations, the sprue assembly is designed using two different IPS Multi Wax Patterns:
* Shape A (shown left) is used for veneers, anterior and posterior crowns as well as for hybrid abutment crowns.
* Shape B is used for delicate crowns on very narrow preparations, such as mandibular anterior crowns.

Article
Jeff Smith, CDT, offers a step-by-step look at how to fabricate esthetic, monolithic restorations in a single press sequence with subsequent glazing using Ivoclar Vivadent’s new IPS e.max Press Multi.

Author
LMT Communications delivers the business strategies, information, dental laboratory news and education that dental laboratory decision-makers need to succeed. In Print. In Person. Online.
Subscribe to LMT Magazine. It's FREE to U.S. addresses.


November/December 2014
Browse all articles from the November/December 2014 issue of LMT Magazine
-

Ivoclar
Company
-
Smart Redesign Delivers More Space in Same Footprint
Kim Molinaro · Inspiring Interiors · June/July 2025
Instead of building a costly addition to its Maumee, OH, facility, Lantz Dental Prosthetics worked with an architect to create a better layout within its...
Here are eight strategies for ensuring a safer environment for your business.
Renstrom Dental Studio: Truly a Family
Jennifer Ludwig · I Want to Work in That Lab · June/July 2025
Lino Lakes, MN; 72 employeesOwners: Randi and Scott James A third-generation, family-run business, Renstrom Dental Studio in Lino Lakes, MN, is built...
Cosmetic Dental Specialties: Quality Over Quantity
Jessie Blanchard · I Want to Work in That Lab · June/July 2025
Portland, OR; 15 employeesOwner: Brianne Lequerica-Munday When I first joined Cosmetic Dental Specialties in Portland, OR, in 2021, I was used to being...
Trains, Planes and Automobiles: The Global Impact of 3D Printing
Kelly Fessel Carr · Publisher's Page · June/July 2025
As we were organizing our Product Focus on 3D Printing Materials for this issue