
To showcase the patient and her final restorations, Dr. Monges went all out with makeup and a backdrop to create a unique “after” photo.
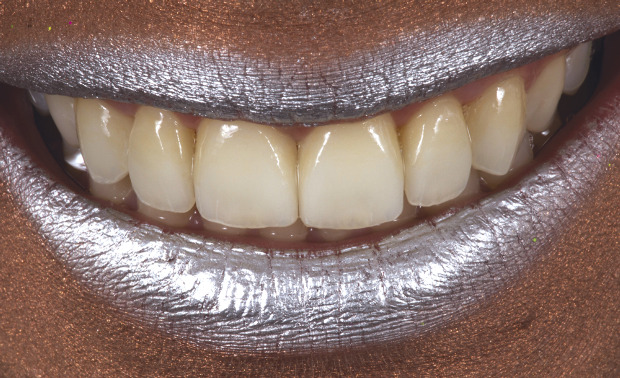
Final Results
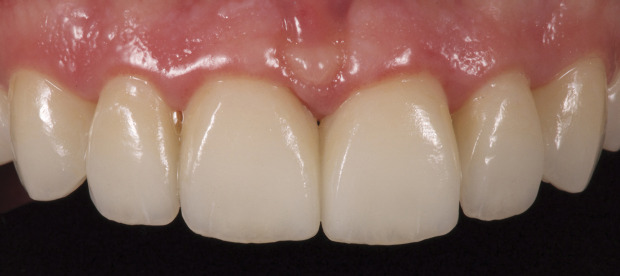
The final cemented restorations blend harmoniously in the mouth, with ideal papilla position and enhanced proportions, shape and embrasures.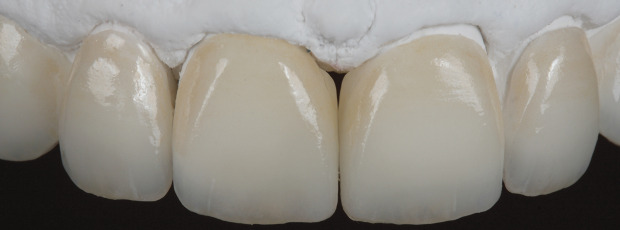
STEP 9 (continued)
The completed veneers on the model after finishing reveal the natural texture, translucency, line angles, incisal and cervical embrasures, and halo that were created. Also note the vitality offered by the IPS e.max MT BL4 ingots.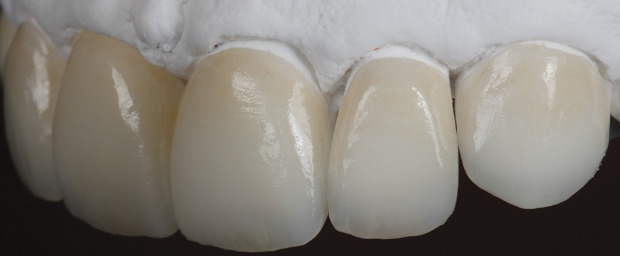

STEP 8
I covered the effects with Incisal 1, baked and then hand polished.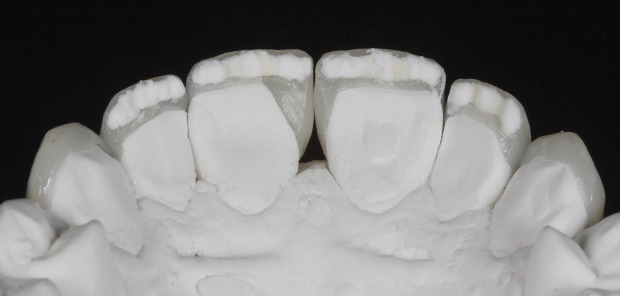
STEP 7
I characterized the outer surface and placed some enamels and opal—T Blue, EO1, EO4, Mamelon Orange-Yellow and Incisal 1—to cover the palatal concavity.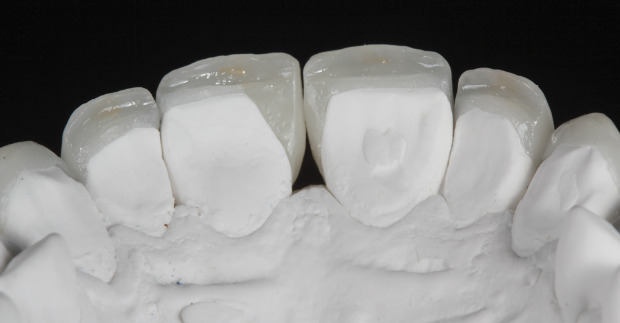
STEP 6
I glazed the entire surface of the veneers using Fluo Glaze powder and stain liquid and fired. For the internal stains, I applied Profundo, Ocean, Cream, White and Copper Essence stains to create a more natural appearance. This lingual view shows the effects of the palatal/incisal Scoop Technique.
STEP 5
After pressing with IPS e.max ingot MT BL4, I fit the veneers to the model and removed the excess reaction layer. I then used my Scoop Technique for natural characterization: I refined the contours, texture and form of the restorations and created a small concavity, or scoop, in the palatal/incisal area.
STEP 4
Dr. Figueira seated the temporary restorations, giving the patient a preview of her new smile.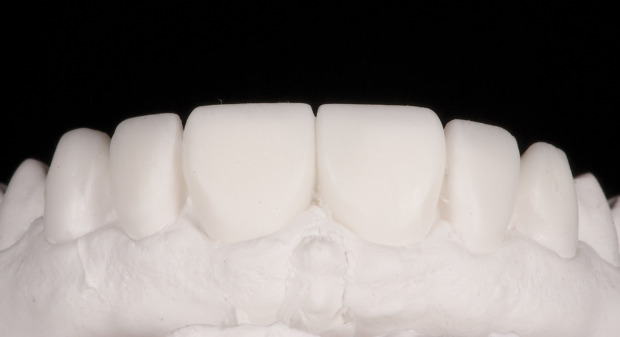
STEP 3
Dr. Monges made a diagnostic waxup, then duplicated it and used it as a matrix for creating the provisional restorations.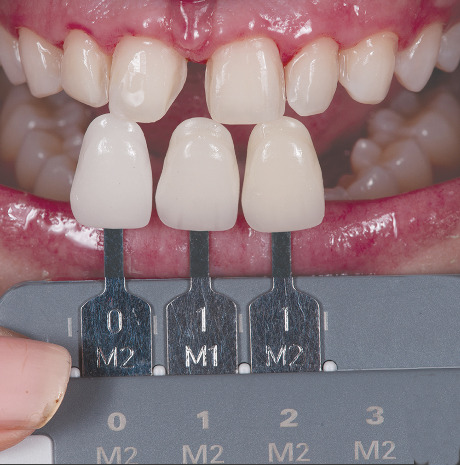
STEP 2
Dr. Figueira took stump shade information and determined the color for the final restorations: 0M1, 1M1 and 1M2.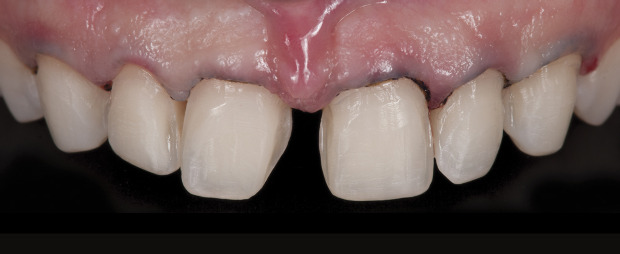
STEP 1
Dr. Figueira removed the old composite restorations, and cleaned and disinfected the areas. He then conservatively prepared the teeth to maintain the enamel and facilitate adhesive bonding and cementation.
Treatment Plan
The case required a highly esthetic material to imitate the translucency of the existing dentition and one that would preserve as much healthy tooth structure as possible. The dental team—including Rafael Santrich, CDT, and Drs. Johan Figueira and John Monges—chose to fabricate six veneers using IPS e.max Press MT, Ivoclar Vivadent’s high-strength lithium disilicate material because it offers optimal integration with the natural dentition. It also allowed Santrich to use his Scoop Technique to reduce opacity and achieve the desired optical effects. This technique incorporates both external staining to create surface detail, and internal staining of the scooped out incisal/palatal aspect to add internal effects.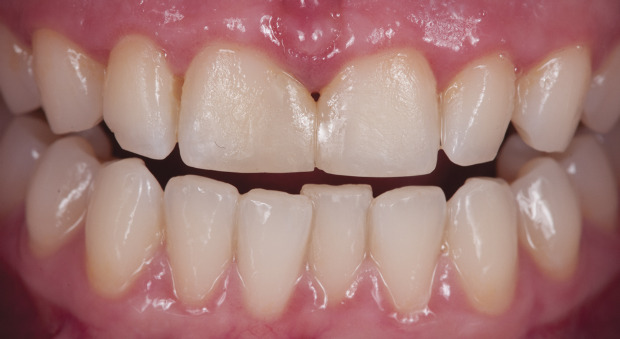
Restorative Challenge
A 34-year-old female patient with six composite restorations on teeth #6-11 complained of a lack of esthetics, irritated tissue due to over-contouring, dissymmetry of her maxillary central incisors and slight rotation of her lateral incisors. The patient requested minimally invasive treatment and a smile with natural esthetics.

Article
Using his Scoop Technique with IPS e.max Press MT from Ivoclar Vivadent, Rafael Santrich, CDT, restores teeth with the natural value, chroma and translucency demanded in the anterior region.

Author
Rafael Santrich
Dental Technician at VM Lab Technologies · Miami, FL
Specializing in fixed restorations and custom cosmetics, Rafael Santrich, CDT, is a native of Cali, Colombia and currently operates VM Lab Technologies, a laboratory in Aventura, FL. He is a graduate of the Press Technology Certification Programs for...
Subscribe to LMT Magazine. It's FREE to U.S. addresses.


October 2015
Browse all articles from the October 2015 issue of LMT Magazine
-

Crown and Bridge
Fields · 4,935 subscribes
-

Ivoclar
Company
-
Smart Redesign Delivers More Space in Same Footprint
Kim Molinaro · Inspiring Interiors · June/July 2025
Instead of building a costly addition to its Maumee, OH, facility, Lantz Dental Prosthetics worked with an architect to create a better layout within its...
Here are eight strategies for ensuring a safer environment for your business.
Renstrom Dental Studio: Truly a Family
Jennifer Ludwig · I Want to Work in That Lab · June/July 2025
Lino Lakes, MN; 72 employeesOwners: Randi and Scott James A third-generation, family-run business, Renstrom Dental Studio in Lino Lakes, MN, is built...
Cosmetic Dental Specialties: Quality Over Quantity
Jessie Blanchard · I Want to Work in That Lab · June/July 2025
Portland, OR; 15 employeesOwner: Brianne Lequerica-Munday When I first joined Cosmetic Dental Specialties in Portland, OR, in 2021, I was used to being...
Trains, Planes and Automobiles: The Global Impact of 3D Printing
Kelly Fessel Carr · Publisher's Page · June/July 2025
As we were organizing our Product Focus on 3D Printing Materials for this issue