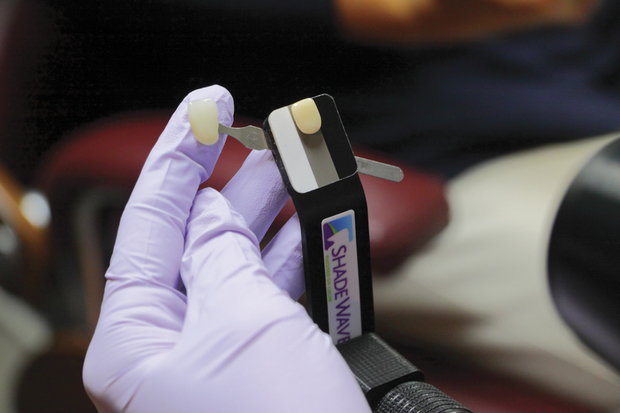
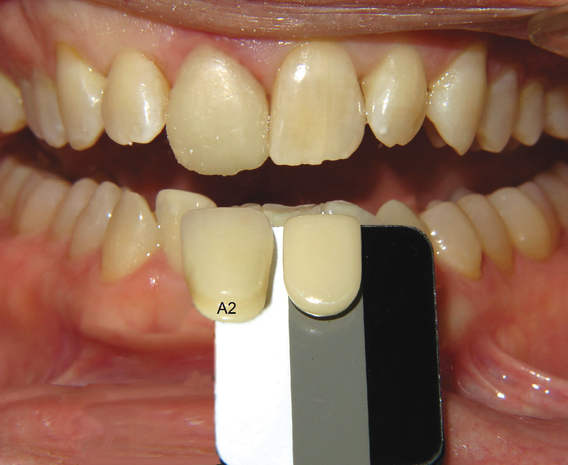
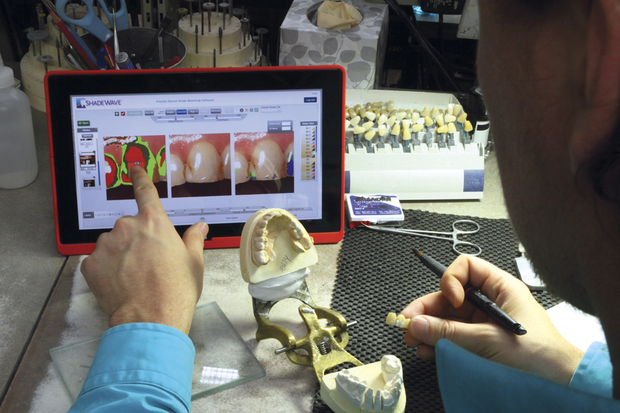
The dentist or assistant inserts a shade tab into the holder of the Shade Reference and positions it under the tooth to be matched; this is done before and after prepping the tooth to get the original shade and stump shade. You can insert any shade tab—in other words, it doesn’t have to be a close match—because it’s only used as a reference.
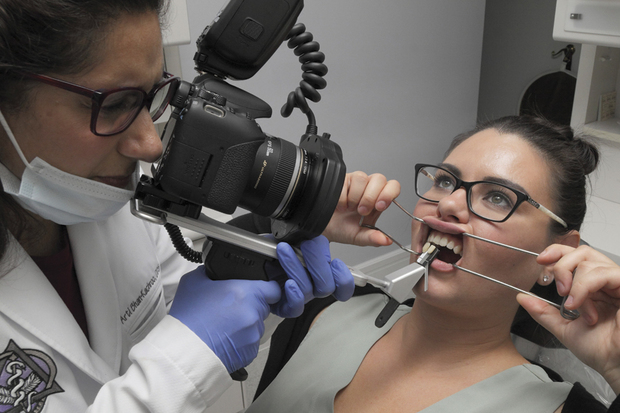
The dentist or assistant takes the photo. The Shade Reference can be hand held or you can purchase the optional Shade Arm camera attachment (shown) that provides a consistent distance, lighting and camera angle, rendering better photos.
The Shade Reference has a proprietary white, gray and black plate and, when used in combination with the inserted shade tab, the system’s software analyzes the shade and color corrects the photo to adjust images from improperly calibrated cameras.
The dentist logs into his account, selects the shade guide he used from the drop-down menu and uploads the photos which are transmitted to the laboratory via a secure remote server.
The laboratory receives an email indicating a case has arrived; it only includes a case number, not the patient’s name, ensuring HIPAA compliance.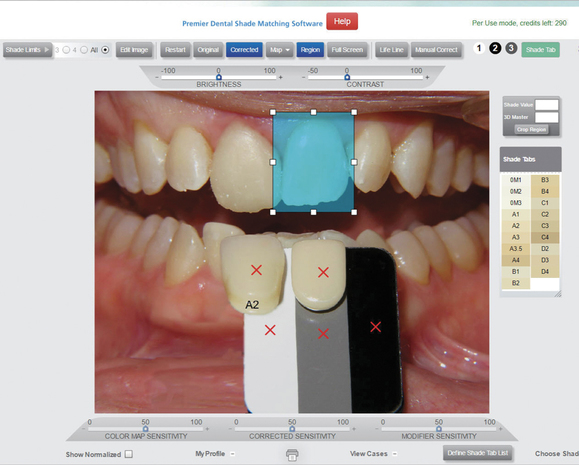
The software prompts the technician to click on five important reference points, as indicated by the red Xs.
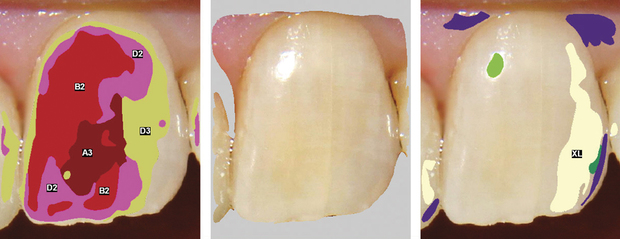
The software features a proprietary algorithm that color corrects the photos, determines the value of the restoration and generates detailed shade and translucency maps. The shade map includes a filter that lets you customize the number of shades displayed; the translucency map offers a scale from “extra light” to “dark.”
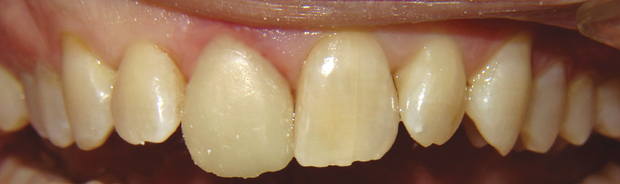
Before.
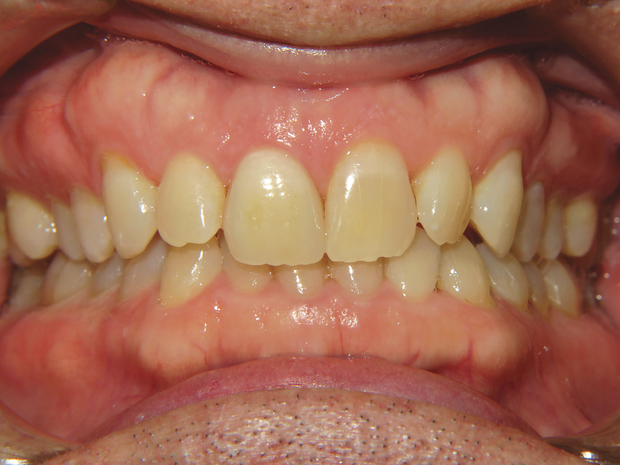
After: Tooth #8 was restored using ShadeWave-generated maps that helped the technician mimic the esthetics of the natural dentition.
ShadeWave also integrates with lab management software and the company provides camera and product support. For more details and pricing, call 425-557-7788 or visit http://ShadeWave.com.

Article
ShadeWave is a patented shade-matching software program that eliminates the common challenges and pitfalls of manual shade taking, improves communication between the dental team members and reduces remakes. The cloud-based system features color-correcting...

Author
Kelly Fessel Carr
Associate Publisher / Editor at LMT Communications, Inc. · Newtown, CT
At the helm of the magazine for over 35 years, Kelly is the heart and soul of the editorial department, guiding and shaping our coverage - both in print and online - to bring dental laboratory decision-makers the news and information they want to know most.
Subscribe to LMT Magazine. It's FREE to U.S. addresses.


October 2018
Browse all articles from the October 2018 issue of LMT Magazine
-
Smart Redesign Delivers More Space in Same Footprint
Kim Molinaro · Inspiring Interiors · June/July 2025
Instead of building a costly addition to its Maumee, OH, facility, Lantz Dental Prosthetics worked with an architect to create a better layout within its...
Here are eight strategies for ensuring a safer environment for your business.
Renstrom Dental Studio: Truly a Family
Jennifer Ludwig · I Want to Work in That Lab · June/July 2025
Lino Lakes, MN; 72 employeesOwners: Randi and Scott James A third-generation, family-run business, Renstrom Dental Studio in Lino Lakes, MN, is built...
Cosmetic Dental Specialties: Quality Over Quantity
Jessie Blanchard · I Want to Work in That Lab · June/July 2025
Portland, OR; 15 employeesOwner: Brianne Lequerica-Munday When I first joined Cosmetic Dental Specialties in Portland, OR, in 2021, I was used to being...
Trains, Planes and Automobiles: The Global Impact of 3D Printing
Kelly Fessel Carr · Publisher's Page · June/July 2025
As we were organizing our Product Focus on 3D Printing Materials for this issue